Maintaining a local copy of an Antigen Plus cloud database
Antigen Plus cloud databases are hosted on Microsoft Azure, which ensures high availability of your data under most circumstances. However, you may want to plan ahead for the possibility that an internet outage would prevent you from reaching our servers and accessing your data.
You can create a local backup of your cloud database that you can restore in the event of an internet outage. We recommend that you perform these backups regularly and test the restoration procedure periodically to ensure that you are prepared in an emergency.
Prerequisites
SQL Server 2016 or later
You must have SQL Server 2016 or later installed somewhere on your local network. The easiest way to achieve this is to install a free copy of SQL Server 2016 Express on the same workstation where Antigen Plus is installed.
Antigen Plus 8.5
Antigen Plus 8.5 should already be installed and configured on at least one workstation.
SQL Server Management Studio 2016 or later
SSMS contains both the application to back up your cloud database manually, and the command-line tools needed to automate these backups.
Configuration
Step 1: Set up automated backups
To be prepared for an emergency, you need up-to-date backups. While Antigen Plus contains a command to back up your database manually, you should automate backups so that they will happen reliably.
There are a number of commercial utilities that can automate SQL Server backups, but here’s how to set up automated backups using free software from Microsoft.
-
Get the database connection strings
Contact customerservice@antigenplus.com to obtain the connection strings to your cloud databases. You will need these connection strings to configure backups.
-
Start Microsoft’s Task Scheduler
-
Right-click on Task Scheduler Library and choose Create task…
-
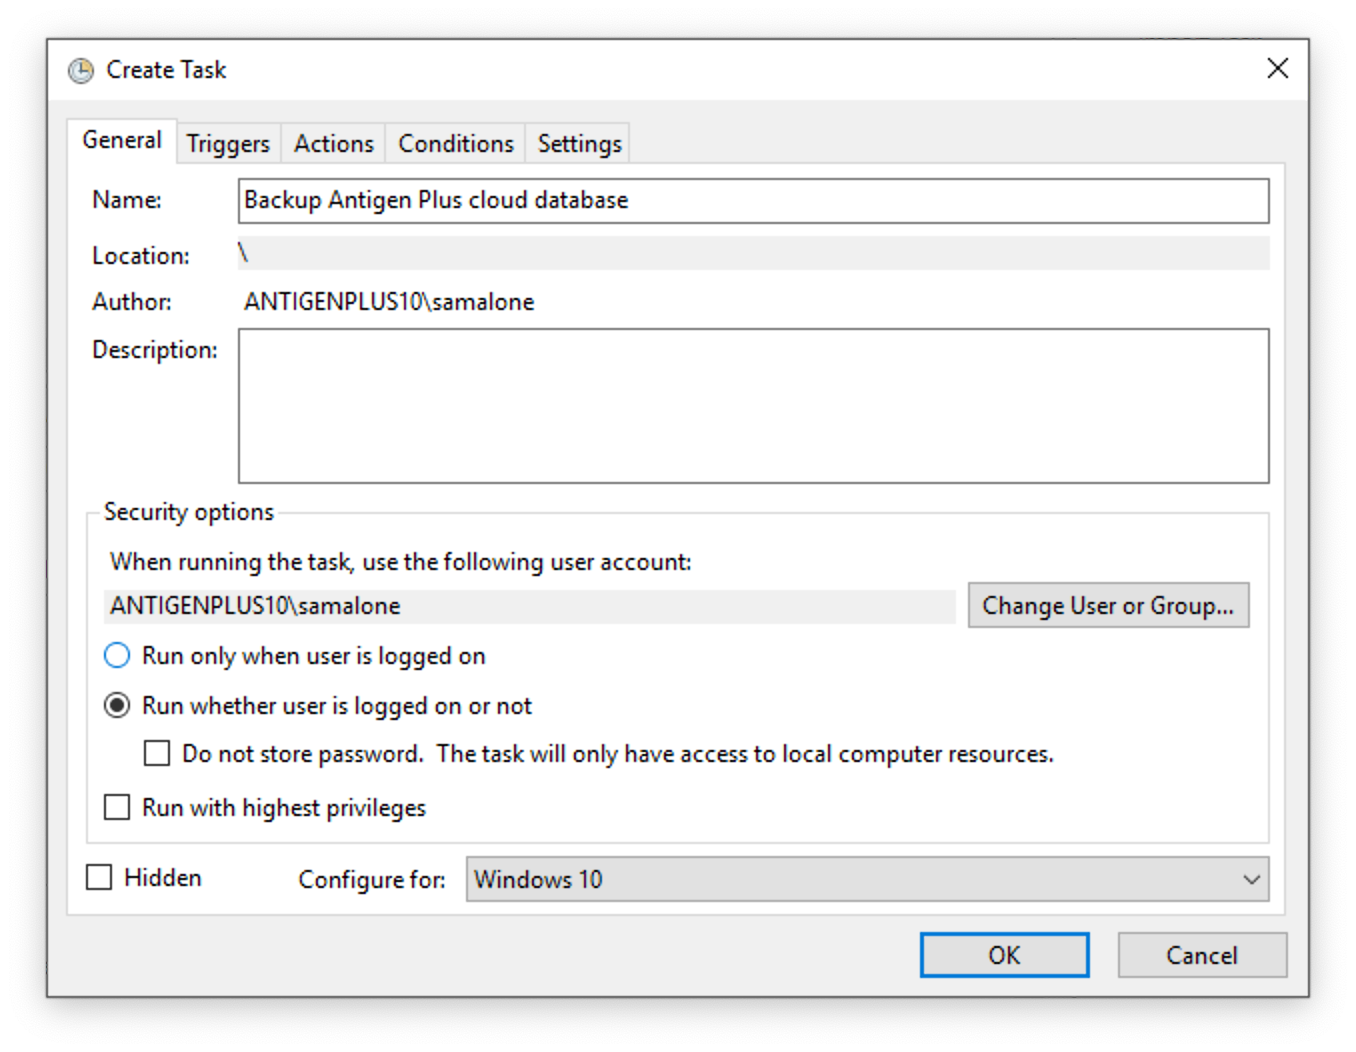
Enter a name for your task like “Backup Antigen Plus cloud database”.
-
To ensure that backups run regularly, select Run whether user is logged in or not
-
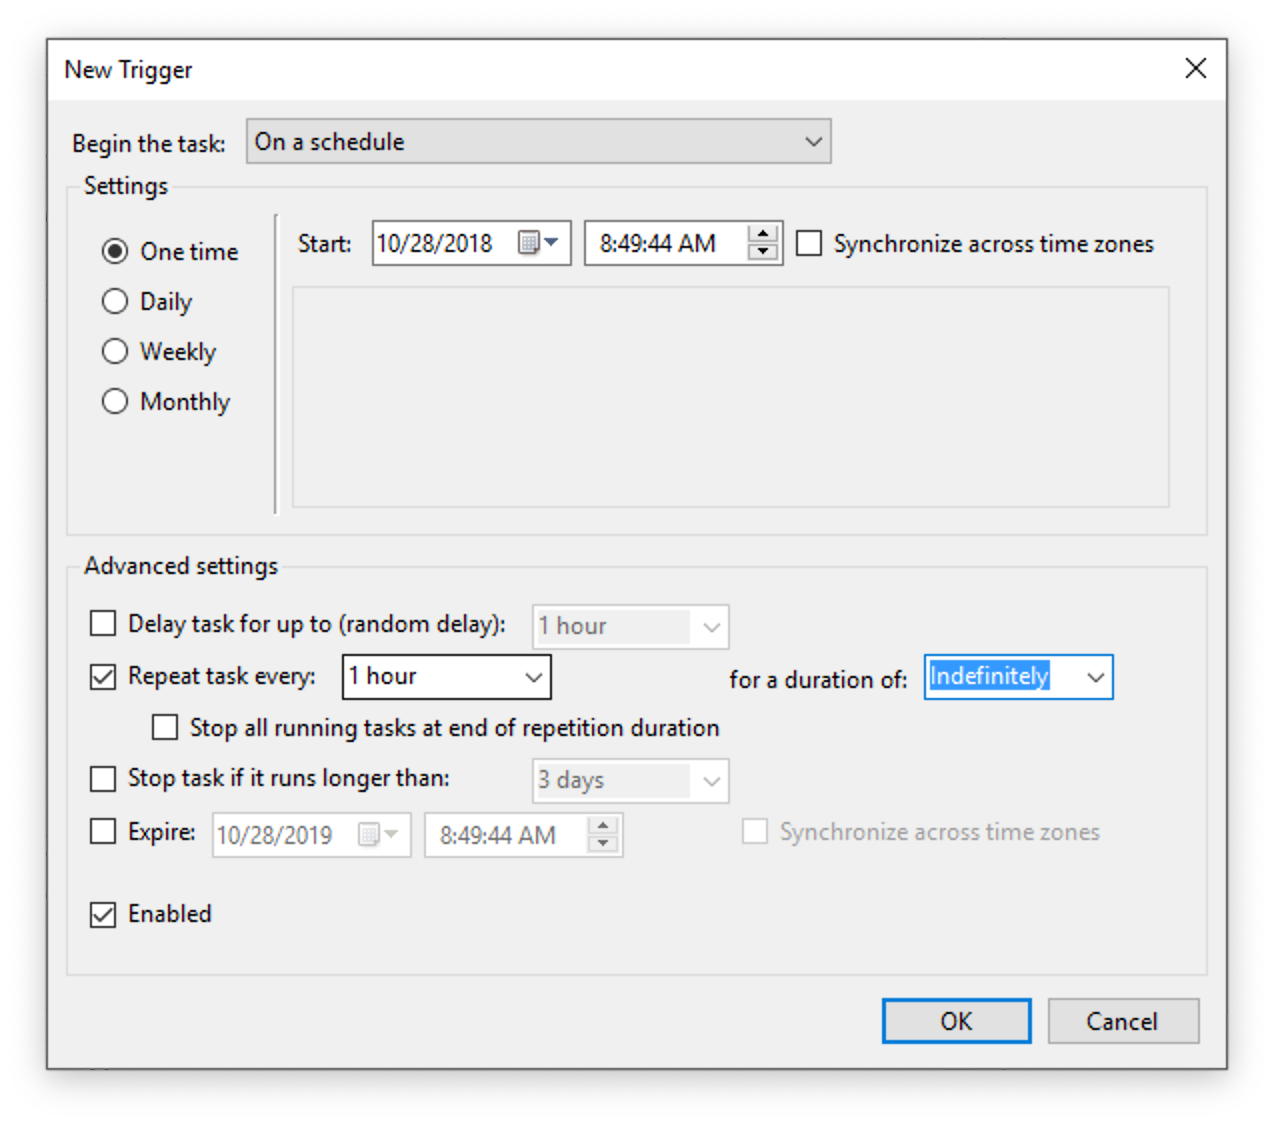
Under the Triggers tab, click the New… button
-
Select Repeat task every 1 hour for a duration of Indefinitely, and click OK
-
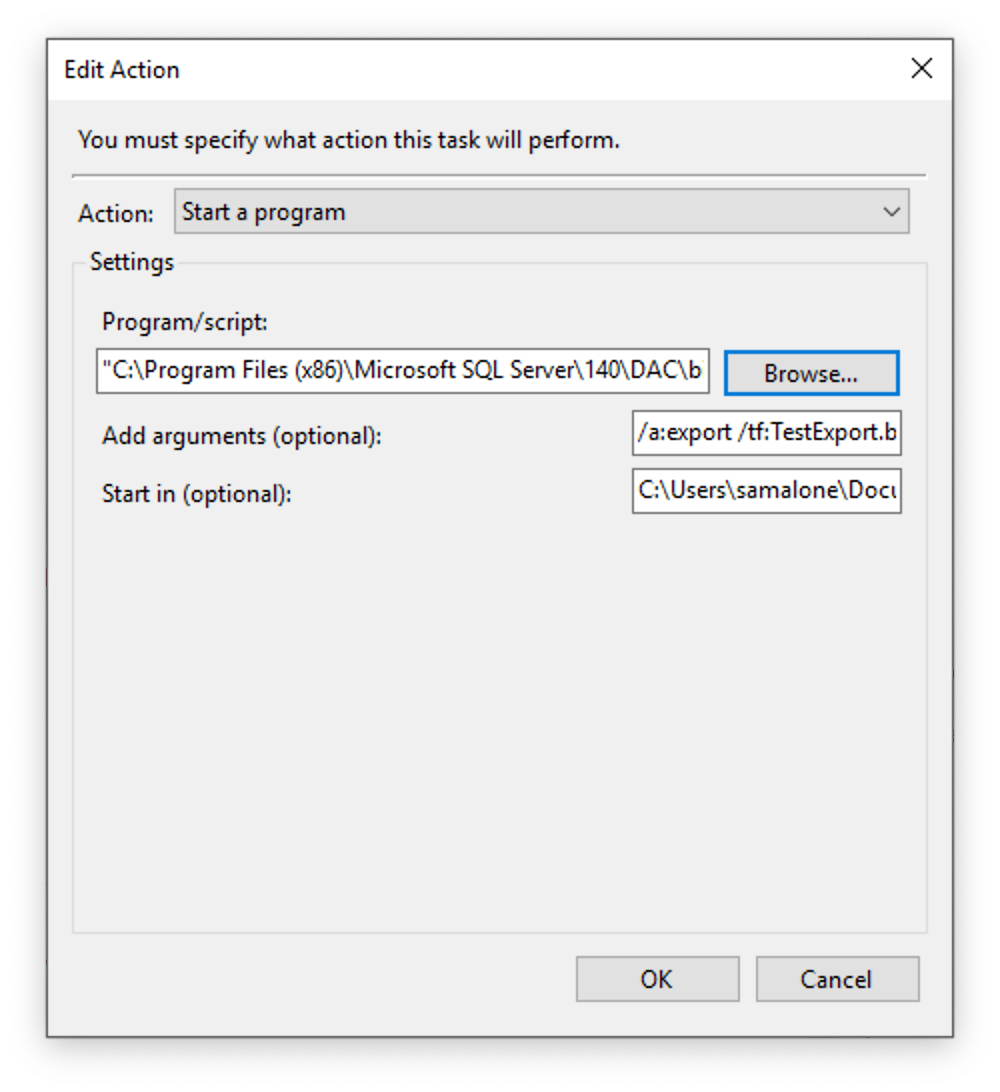
Under the Actions tab, click New…
-
Under the Start a program action, use the Browse button to select the program SqlPackage.exe, which is installed as part of SQL Server Management Studio. (On my computer, that is found in the
C:\Program Files (x86)\Microsoft SQL Server\140\DAC\bindirectory.) -
Under Add arguments, enter the following:
/a:export /tf:DatabaseName.bacpac /scs:”ConnectionString”
Substitute the name of your database for DatabaseName and the connection string provided by Antigen Plus for ConnectionString.
-
Under Start in, enter the path to the directory where the backups should be stored. Since the backup should be accessible in event of a network outage, we recommend that you store backups on a local hard drive, not a network drive.
-
Click OK twice to finish creating the task.
When you create the task, the first backup should begin immediately, and backups should repeat every hour thereafter.
Step 2: Restore the first backup
Verify that your local SQL Server is working and is compatible with the backup format by performing a test restore.
-
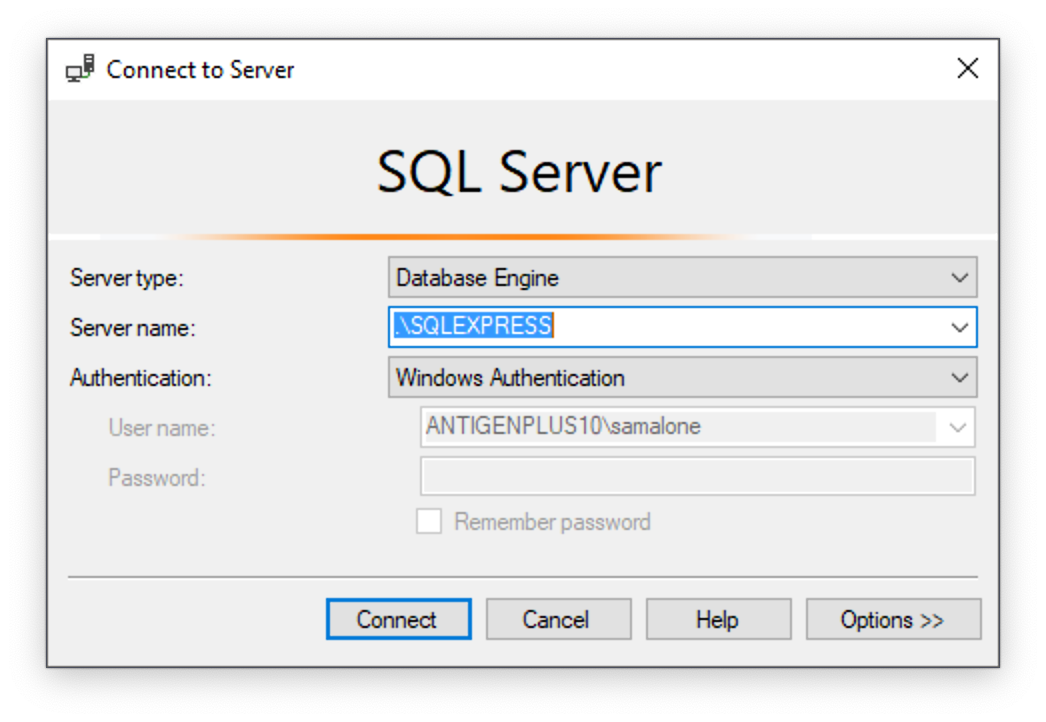
Start SQL Server Management Studio
-
In the Connect to server dialog, enter the name of your local SQL Server and click Connect. The default server name is .\SQLEXPRESS
-
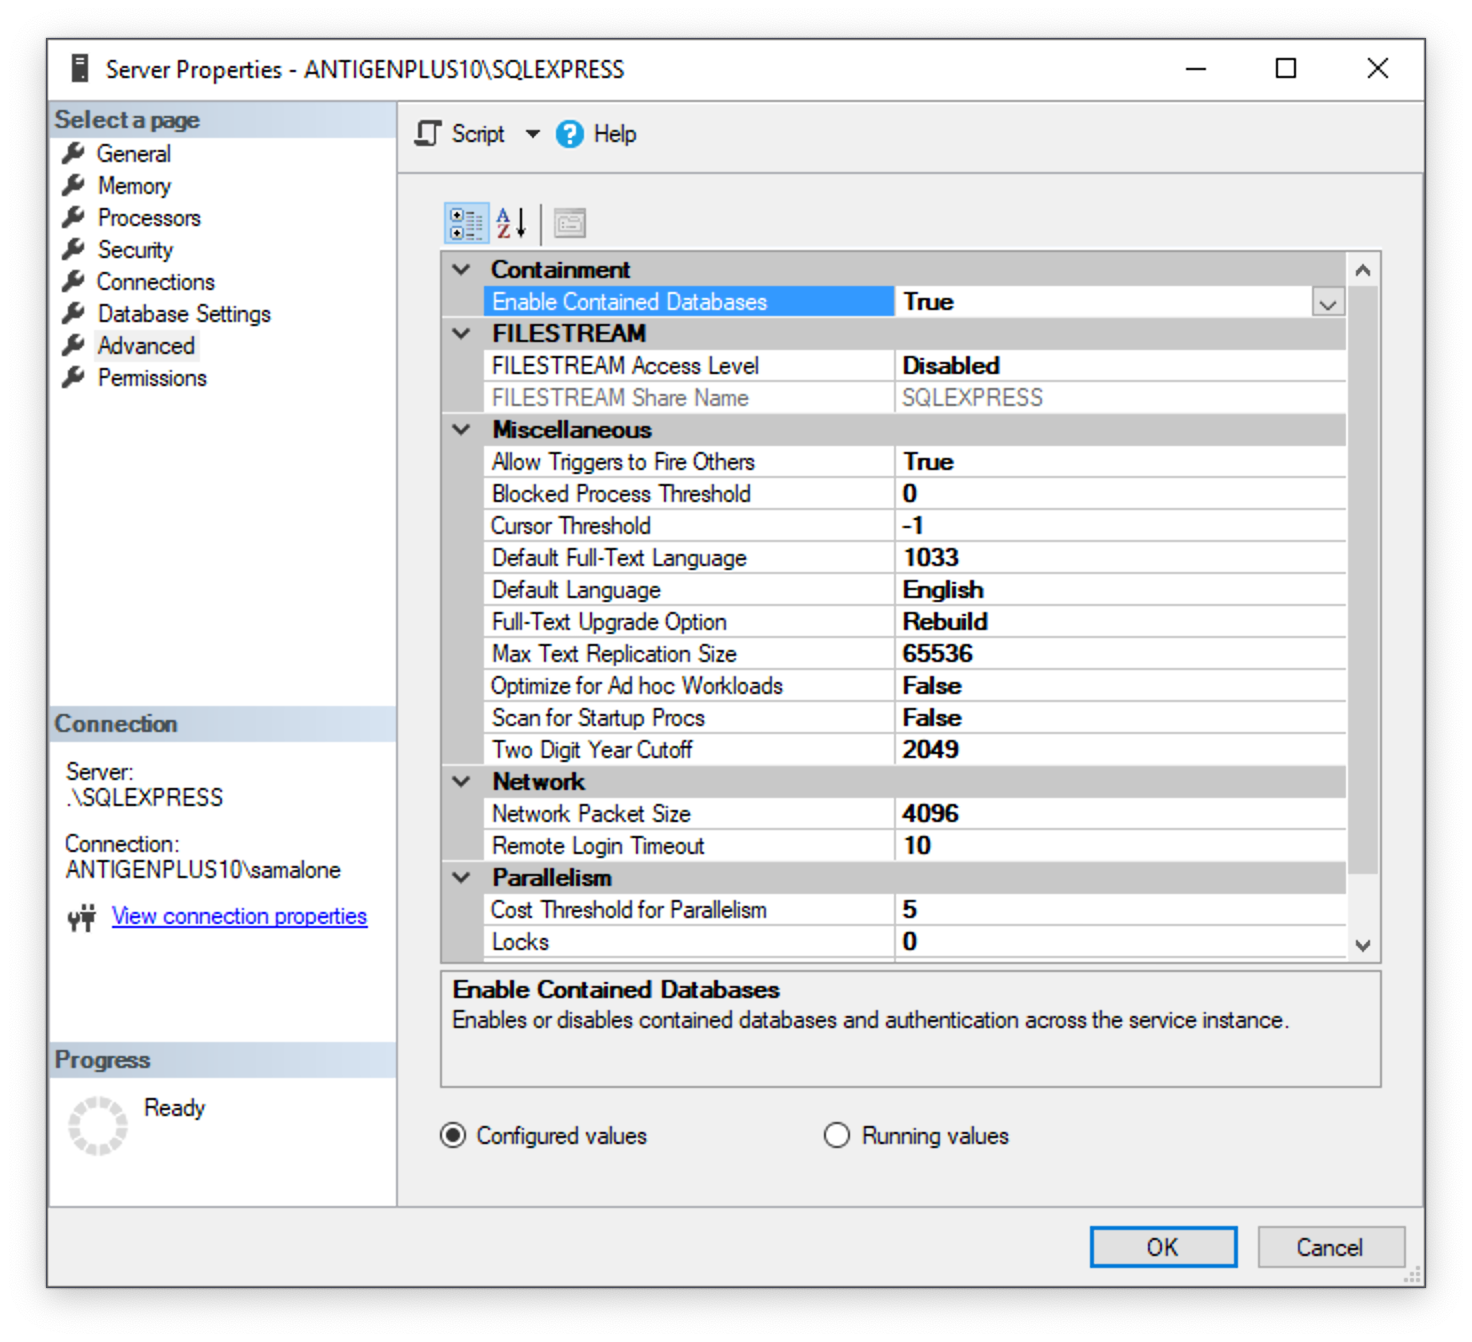
Before restoring a database for the first time, you must change a property on the server. Right-click on the name of your database server in the Object Explorer on the left, and choose Properties. In the Advanced section, change Enable Contained Databases to True and click OK.
-
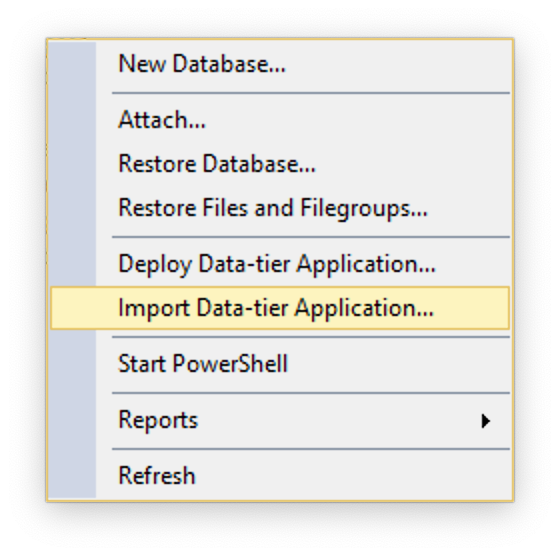
In the Object Explorer on the left, right-click on Databases and choose Import Data-tier Application…
-
Click Next to skip the introduction, and then use the Browse… button to select the .bacpac file created by your scheduled task.

-
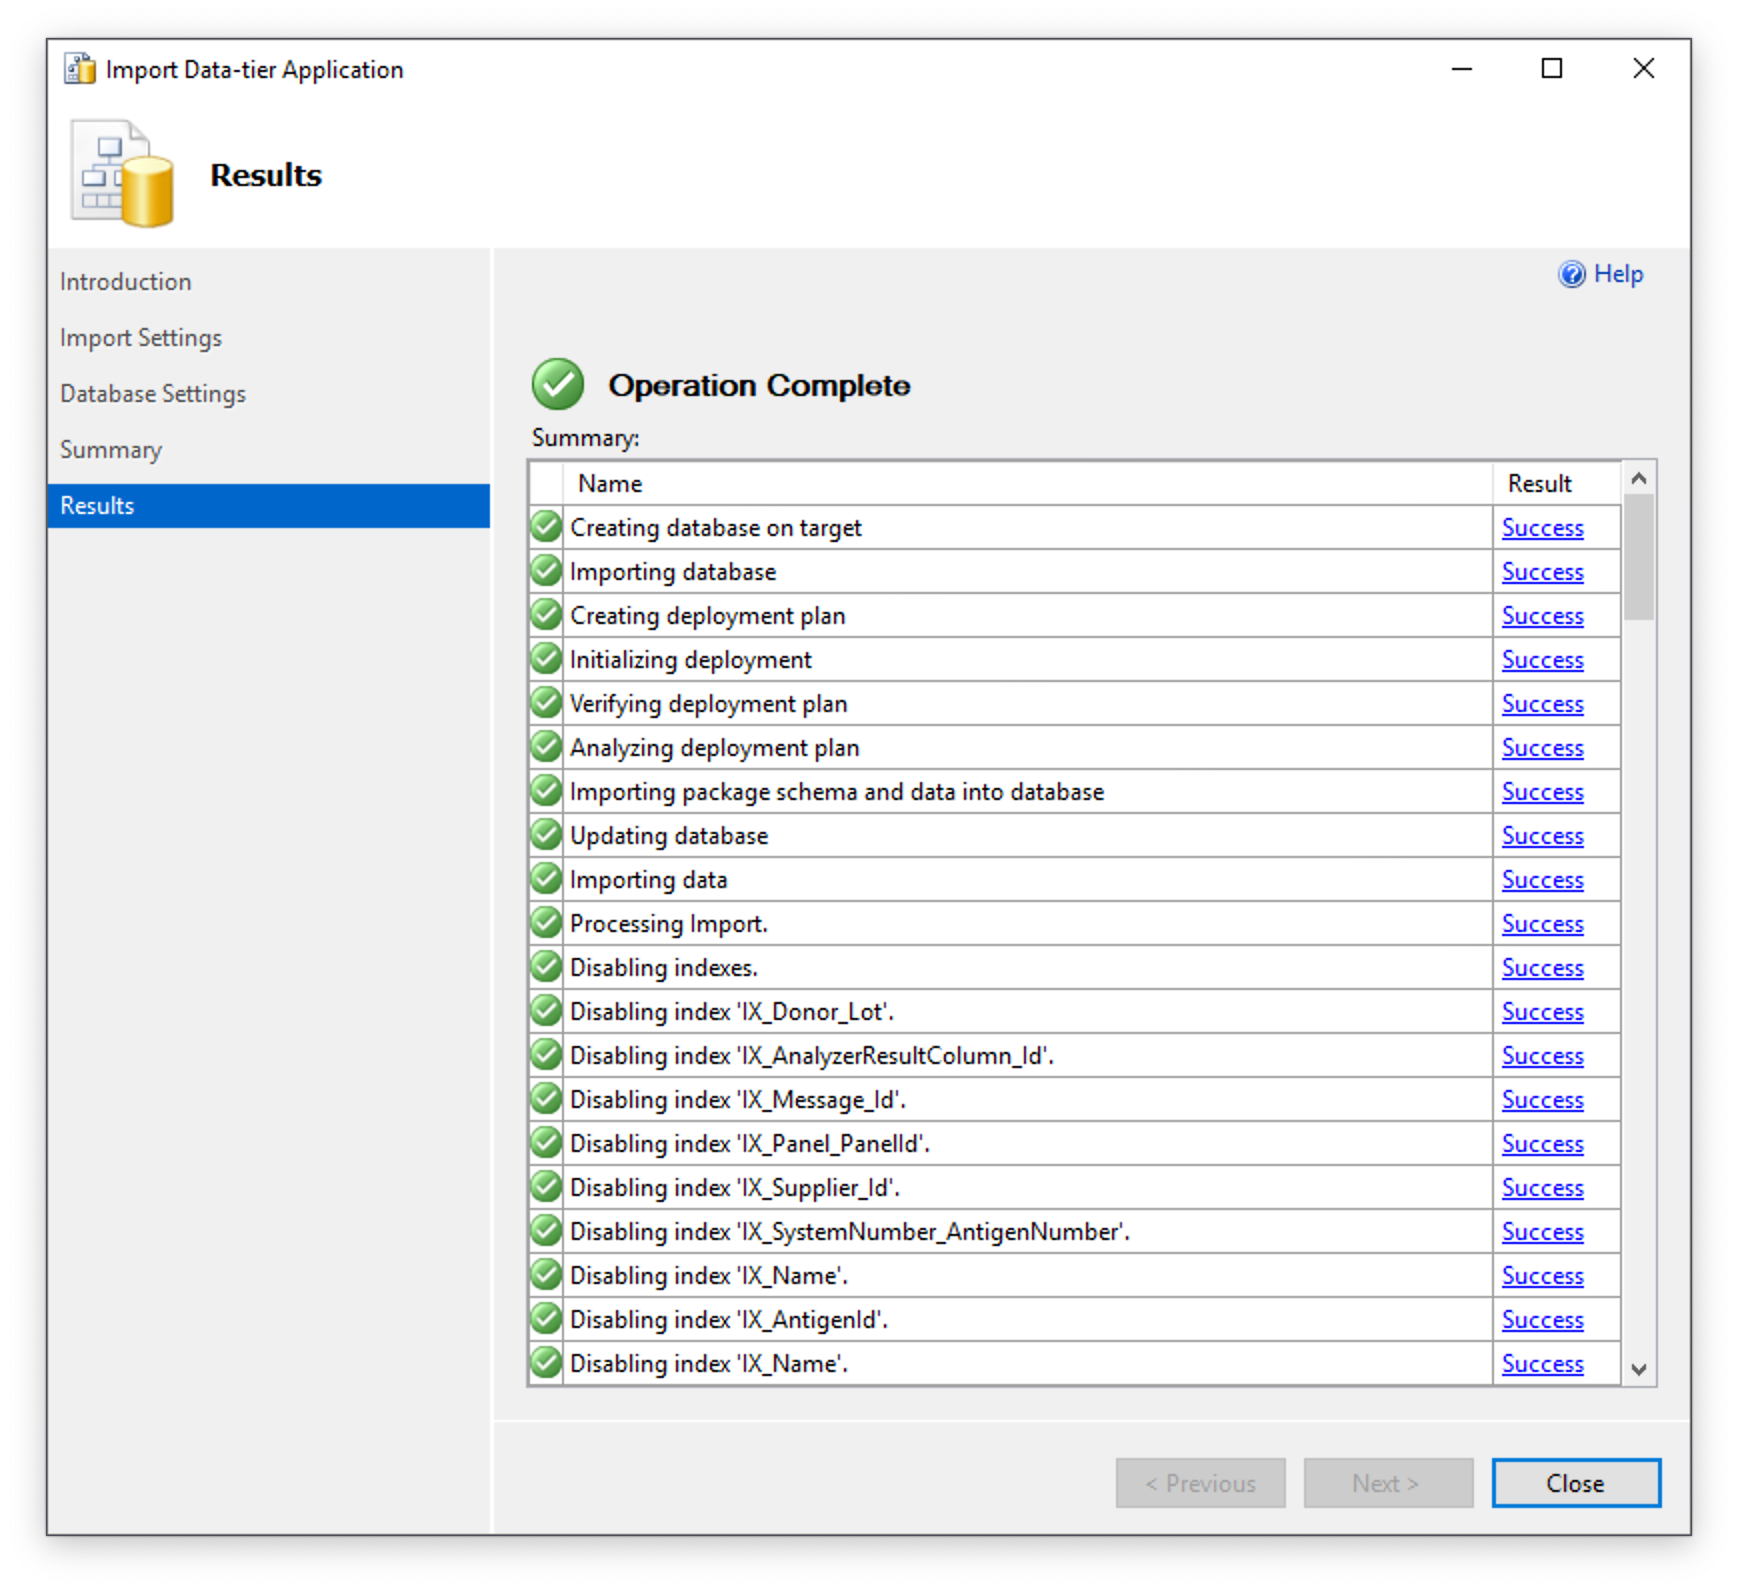
Click Next twice and then Finish to begin the import. If the import is successful, you should get a screen of green checkmarks.
Step 3: Configure Antigen Plus to open the local database
You must edit the file connections.config to teach Antigen Plus the location of the local database. Editing this file requires that you have administrative rights to the local workstation.
-
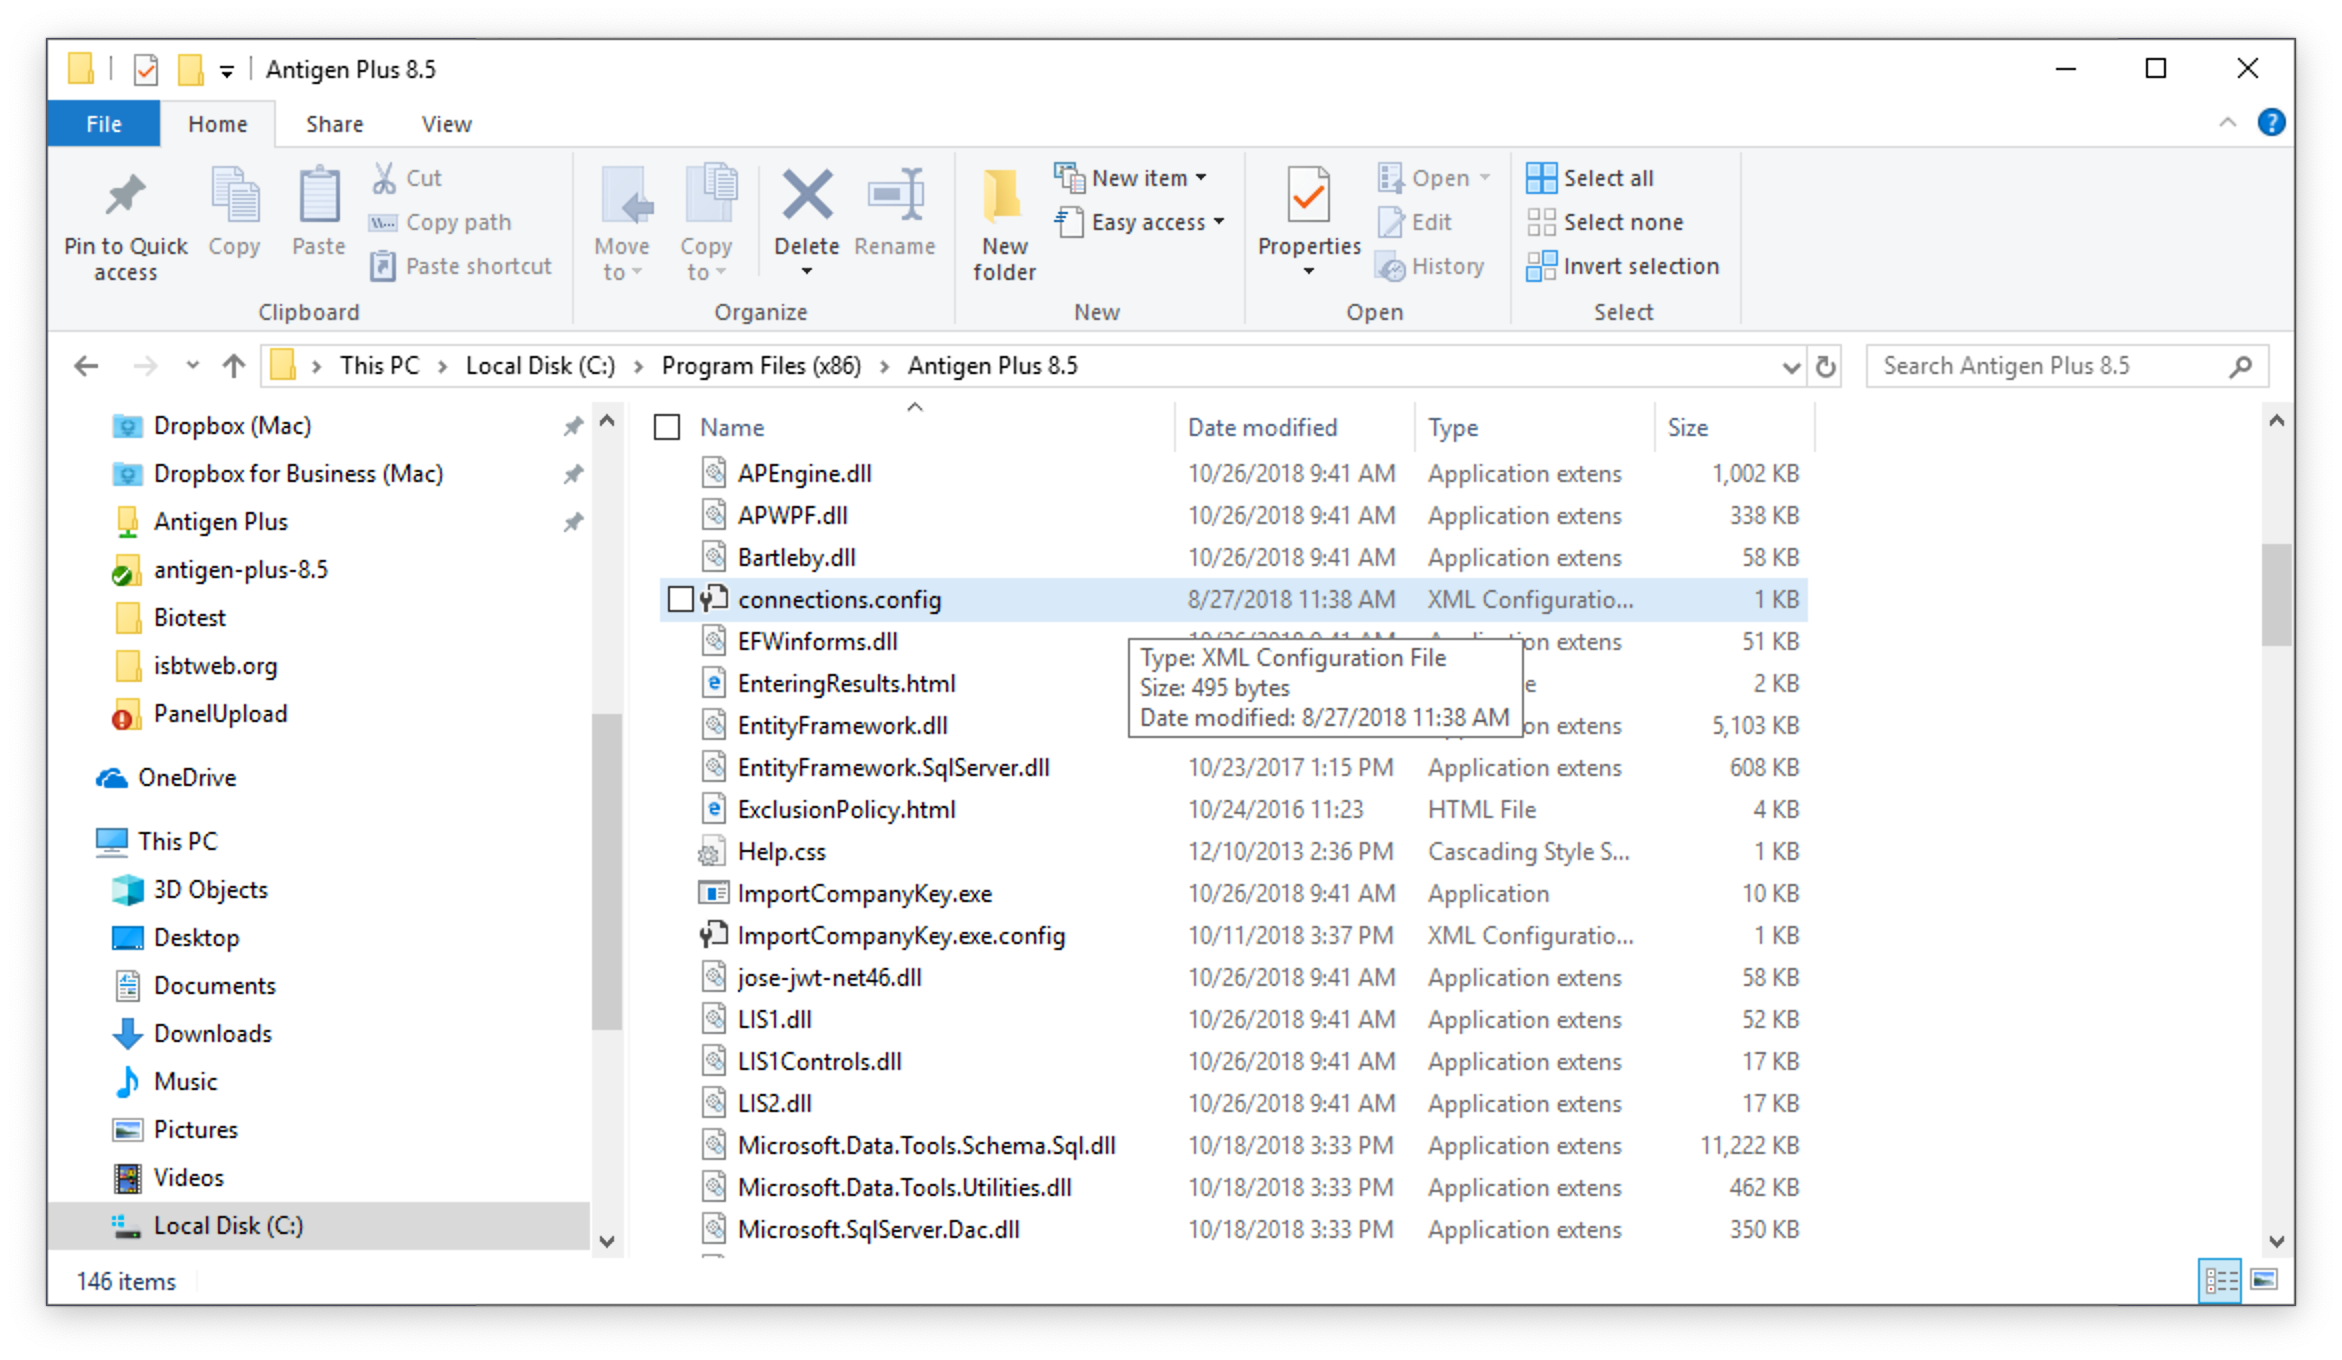
Open the Antigen Plus installation folder (C:\Program Files (x86)\Antigen Plus 8.5), right-click on the file connections.config, and choose Copy.
-
Right-click on your desktop and choose Paste
-
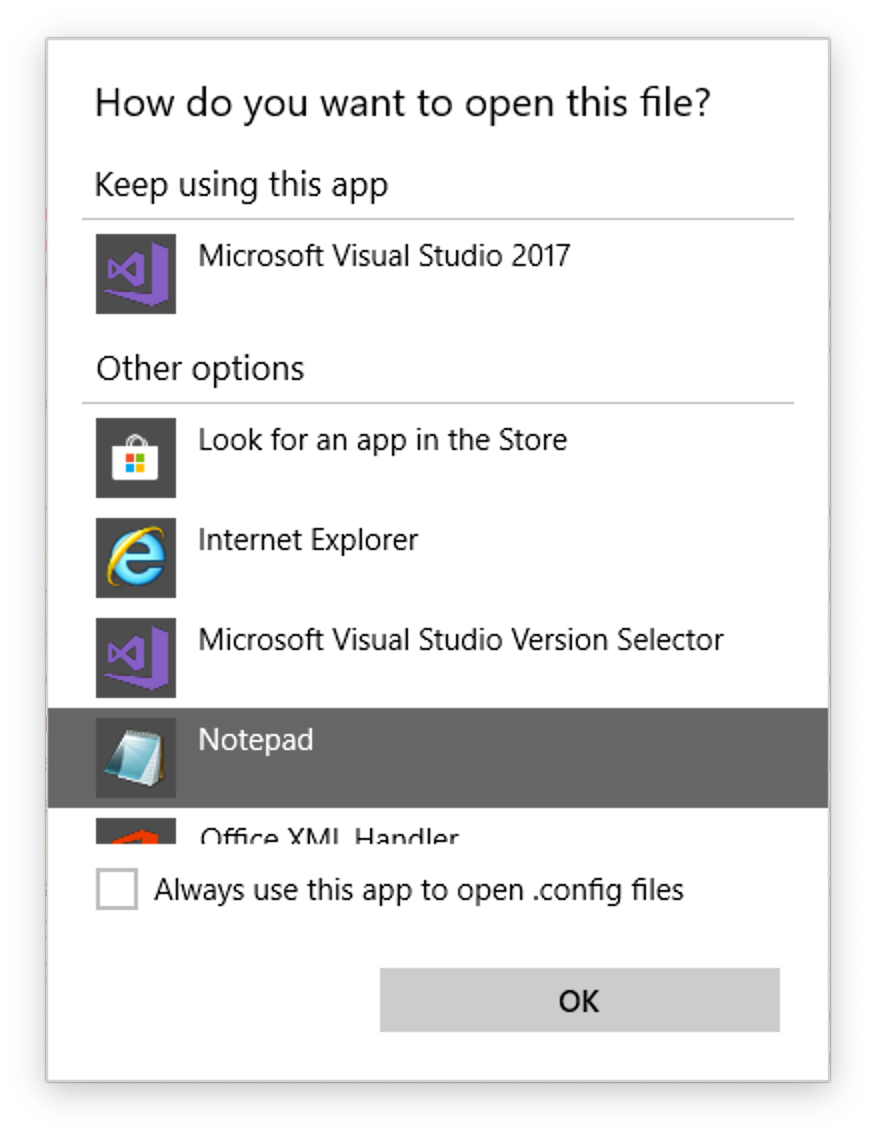
Right-click on the copy of connections.config on your desktop and choose Open with… to edit the file with Notepad.
-
This file contains commented-out examples that you can use as a starting point. The examples are inside the <!– and –> delimiters. Your own commands must be outside of these delimiters. Copy one of these examples and paste it outside of the delimiters, then edit the name, data source, and initial catalog to match the database that you restored in Step 2. The name can be any name you like. When you are done the file should look something like this:
<?xml version="1.0" encoding="utf-8"?> <connectionStrings> <clear /> <add name="Test" connectionString="Data Source=.\SQLEXPRESS;Initial Catalog=TestExport;Integrated Security=True;Connect Timeout=30" providerName="System.Data.SqlClient" /> <!-- <add name="Validation" connectionString="Data Source=OurSQLServer;Initial Catalog=AntigenPlusValidation;Integrated Security=True;Connect Timeout=30" providerName="System.Data.SqlClient" /> <add name="Production" connectionString="Data Source=OurSQLServer;Initial Catalog=AntigenPlusProduction;Integrated Security=True;Connect Timeout=30" providerName="System.Data.SqlClient" /> --> </connectionStrings> -
Save the file, quit Notepad, and copy/paste the file from the desktop back into the Antigen Plus installation folder. You will be prompted for administrative privileges to replace the file.
-
To test your changes, launch Antigen Plus 8.5 and choose Select database… from the File menu. The local database should appear in the list of available databases.
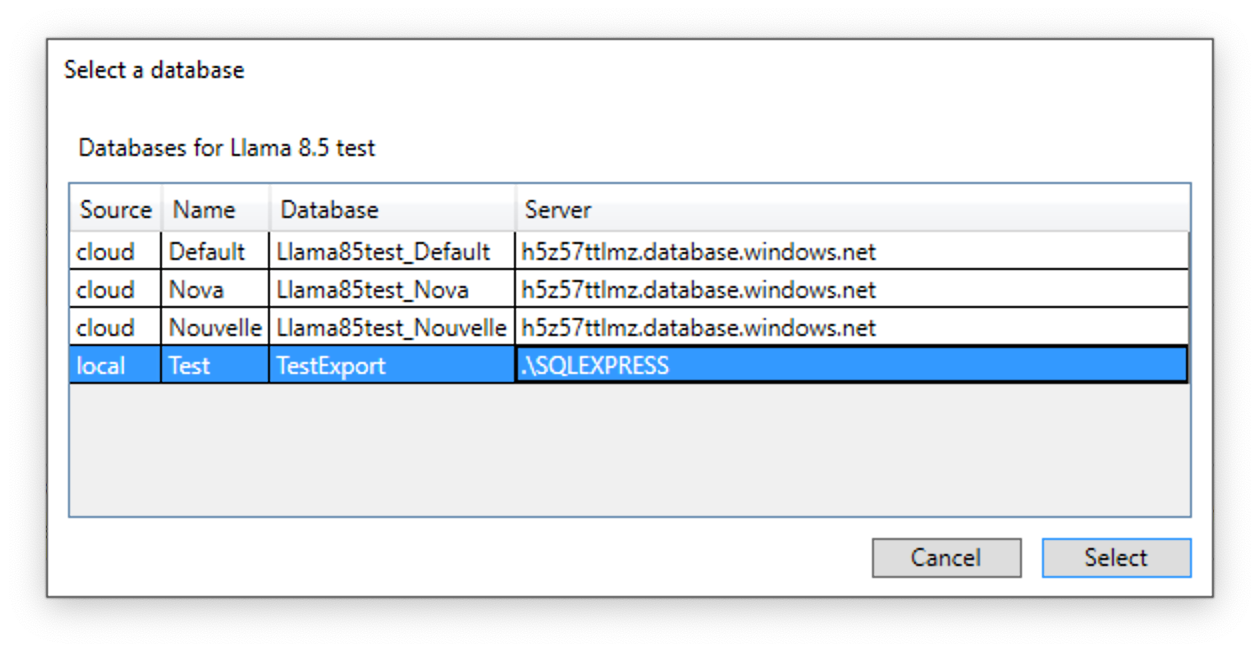
Double-clicking on the local database should switch you to the restored local database.
Step 4: Create a shortcut to open the local database
This step is optional, but it makes it easier to use the local database when needed.
-
Open the Antigen Plus installation folder (C:\Program Files (x86)\Antigen Plus 8.5) and right-click to copy the file AntigenPlus8.exe
-
Right-click on the desktop, and choose Paste shortcut to create a shortcut.
-
Rename the shortcut to something appropriate like Antigen Plus local database
-
Right-click on the shortcut to edit its Properties
-
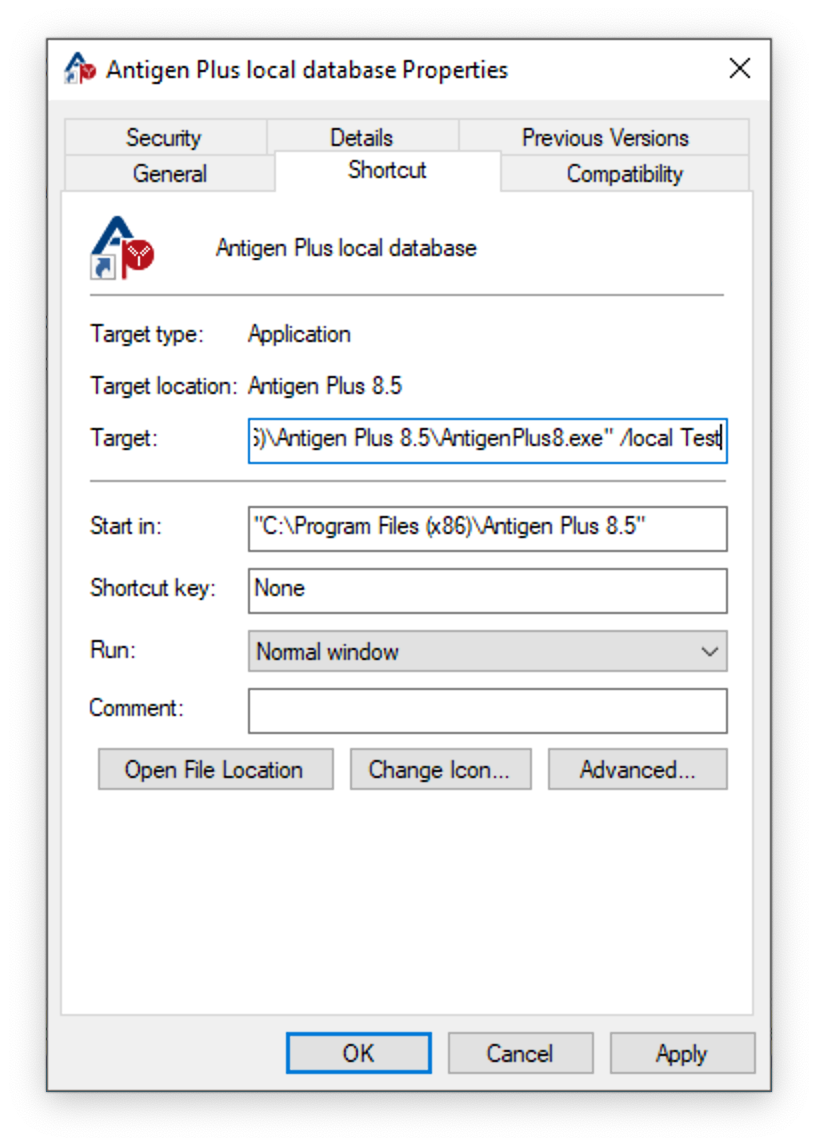
Use the right arrow key on the keyboard to move to the far right end of the Target field, and then enter the text “ /local Test” (without the quotes), where Test is the same name that you entered when you edited the connections.config file in Step 3. When you are done, the Properties should look something like this:
-
Click OK to close the shortcut properties.
-
Test the shortcut by double-clicking it. Antigen Plus should launch and connect you directly to the local database. You can confirm the selected database by looking in the upper-right side of the application.
Responding to a network outage
With the above steps complete, you should have hourly backups of your Antigen Plus cloud database and all the software you need to run locally in the event of a network outage.
As part of your emergency preparedness strategy, you should periodically test this backup and restore procedure to ensure that backups are running without error and that all software is configured correctly. You can temporarily disconnect your workstation from the network or disable networking to test your emergency procedures.
In the event of a network outage:
- Start SQL Server Management Studio and connect to the SQL Server running on the local workstation. (.\SQLEXPRESS by default)
- Open the Databases folder and locate the previous local test database for Antigen Plus.
- SSMS is unable to replace one database with another, so you will need to delete the previous local test database before you can restore the new one. Right-click on the previous local test database and choose Delete to delete the old database.
- Right click on the Databases folder and choose Import Data-tier Application… as described in Step 2 to restore the latest database backup from the folder you specified in Step 1.
-
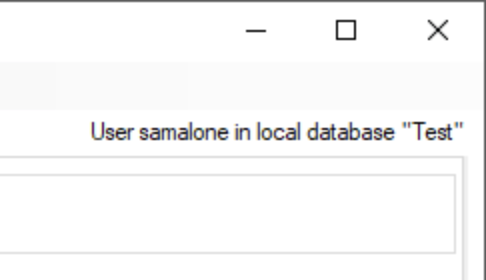
When the restore is complete, quit SSMS and launch Antigen Plus using the shortcut that you created in Step 4. Note that launching may be slower than usual as Antigen Plus tries and fails to connect to the Antigen Plus server. You may also see a message like the following:
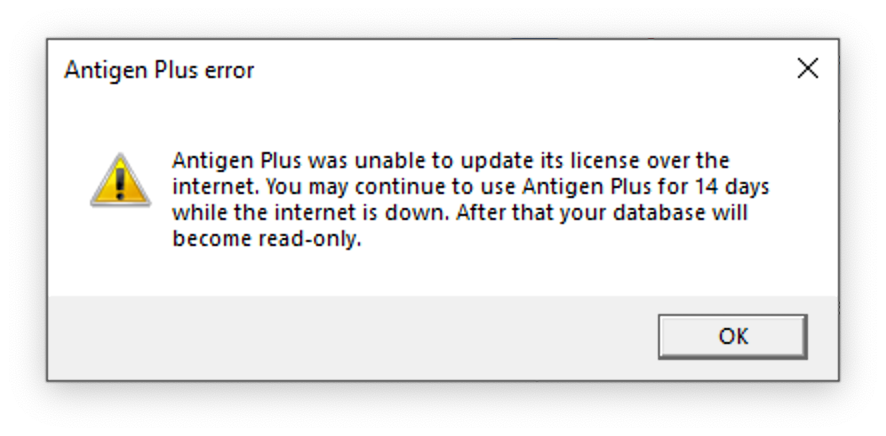
Once Antigen Plus is running, it should run at normal speed.