Menus
File Menu
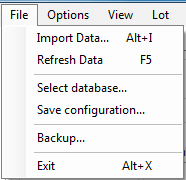
The File menu accesses five functions: Import Data, Refresh Data, Select database, Save configuration, Backup, and Exit.
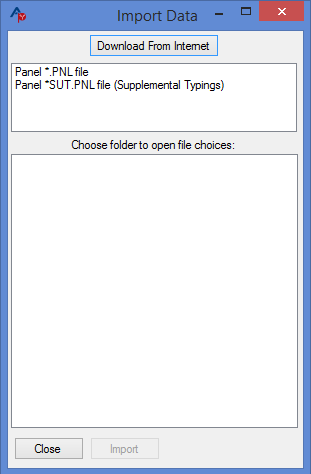
- Import Data
-
Allows the importation of commercial lots from the internet or the importation of panels in Antigen Plus format from other sources.
- Refresh Data
-
If you are doing a search and another user is downloading or entering cell data at the same time, Refresh Data will ensure that the new data are available to you for search.
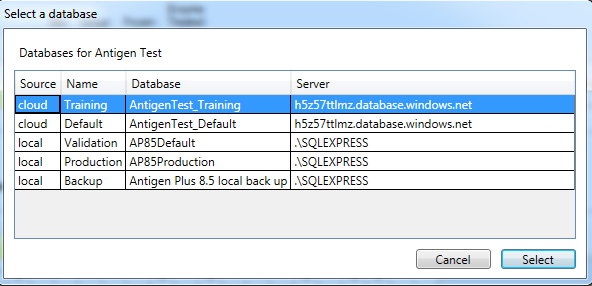
- Select database
-
This option opens a screen that shows the available databases and allows you to select one of them.
- Save configuration
-
Available to software administrators, this item allows the saving of the configuration files for the software. The saved copy of the file
connections.configwill be encrypted with the workstation’s key, preventing users from reading it in plain text. Replace the unencrypted version ofconnections.configin the installation folder with the encrypted version to protect the connection strings. Note that this process must be repeated on each workstation, as the encryption key is workstation-specific. - Backup
-
Prompts you to select a location to back up all of your Antigen Plus data. This feature was designed for a locally hosted database but is also useful for maintaining a local fail-safe back up of the cloud hosted database for use during an internet outage or in the highly unlikely case of a massive multiple system failure both in our backup facilities and in Microsoft Azure.
-
To avoid losing your data in the event of a pc or system failure, we recommend that you store these data on a drive or storage device that is separate from your system. The data may be easily retrieved by Antigen Plus using SQL Server Management Studio. Instructions can be found in "Antigen Plus 8.5 Installation and Configuration."
Options Menu
System Options
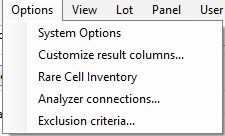
The System Options menu allows you to set and/or change general default parameters for using Antigen Plus in your lab. There are three tabs on this menu—one each for General, Search, and Printing options.
General Tab
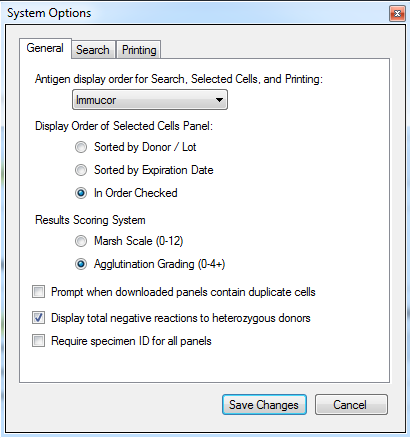
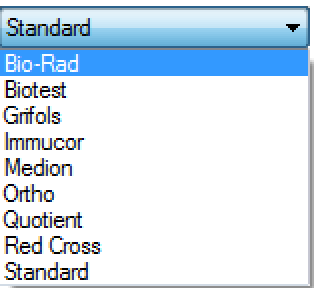
- Antigen Display Order for Search, Selected Cells, and Printing
-
Sets the display order for cells on each screen where the antigen array appears. The antigen array of whichever manufacturer (or alternative) is selected will be the one you use for searching, selecting, and entering your test results.
- Display Order of Selected Cells Panel
-
Allows you to view your selected cells in one of three sorted orders in Selected Cells panels and Results Worksheets.
- Results Scoring System
-
Allows you to select one of two scoring systems for entering your test results in the Results Worksheet.
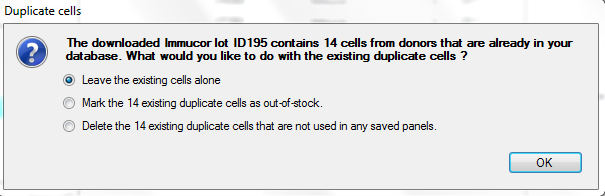
- Prompt When Downloaded Panels Contain Duplicate Cells
-
Activates an automatic check for duplicate cells when you are downloading commercial red cell panels. If you chose this option, when you download a panel, you will be alerted to the existence of duplicate donor cells in your database and be given the option to ignore them, mark them out-of-stock, or delete them (as long as they are not in any worksheet that you have saved).
Please note: If you are importing two identical panels (e.g. Quotient panels that are the same except that one is enzyme treated), both panels will be marked out-of-stock if you have this feature turned on and choose the out-of-stock option.
- Display total negative reactions to heterozygous donors
-
This option adds a rule-out count row to the Worksheet to show reactions that that may provide more evidence toward an exclusion when the required homozygous cells are not available for testing.
- Require Specimen ID for All Panels
-
Makes it a requirement to add a Specimen ID number to any saved panel. When this is selected, you may not save any work-up without entering a specimen ID number. Only administrators may set this option. For more information about adding specimen ID numbers, see page 34??.
Search Tab
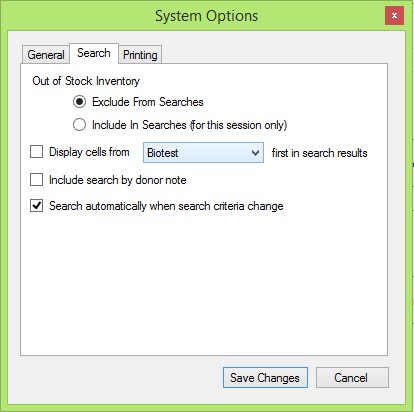
- Out of Stock Inventory
-
Allows you to include out-of-stock cells in your searches.
- Display Cells from Supplier First in Search Results
-
Allows you to prioritize your search by a single supplier. Normally, when cells are searched, the search order is freshest to oldest to frozen. This option allows you to find all the cells from one supplier in that order before other cells are found. This feature is designed to make cell selection easier for those labs that rely most heavily on a single supplier or test system and would prefer to test those cells unless none are available with the required characteristics.
- Include Search by Donor Note
-
Activates the search by donor note function on the Search screen. The text box on the screen will search donors by whatever text is in an associated note. This is primarily useful for reference labs with frozen inventories of rare cells and cells they have typed and frozen themselves.
- Search Automatically When Search Criteria Change
-
Removes the Search button from the Search Cells screen. When this is done, cells matching each criterion entered are found and displayed. As more criteria are added, the cells change to match the cumulative pattern. Hospitals and blood banks with an inventory of fewer than 200 cells may find it more convenient to search in this manner as it eliminates the necessity of hitting the search button to initiate a search.
Printing Tab
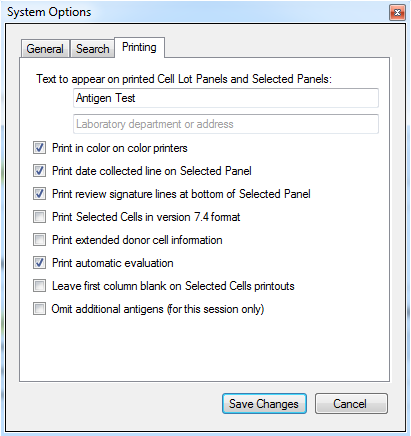
- Text to Appear on Printed Cell Lot Panels and Selected Panels
-
Allows you to enter text that will be printed on any printed output to identify your facility. There are no limits to the amount of text you can enter, but filling more than the space available will result in overprinting issues.
- Print Review Signature Lines at Bottom of Selected Panel
-
Allows you to print signature review lines on the bottom of the printed Selected Cells Panel if you are doing manual rule-outs.
- Print Selected Cells in Version 7.4 Format
-
Allows the Selected Cells Panel to print in the format used in Version 7.4. This is to satisfy SOP requirements of reference labs that have been accustomed to this format.
- Print Extended Donor Cell Information
-
Enables the printing of extended information about each donor cell on panel at the end of a selected panel or worksheet.
- Print Automated Evaluation
-
This feature is checked as the default for the software. Unchecking it allows the printing of the worksheet without the evaluation for those who wish to do the evaluation manually using the worksheet layout.
- Leave First Column Blank on Selected Cells Printouts
-
Eliminates the text in the first column of a printed Selected Cells Panel –the selection order number and any out of date or frozen designation will appear on the screen but not on the printout to allow space for manual notes.
Customize Results Columns
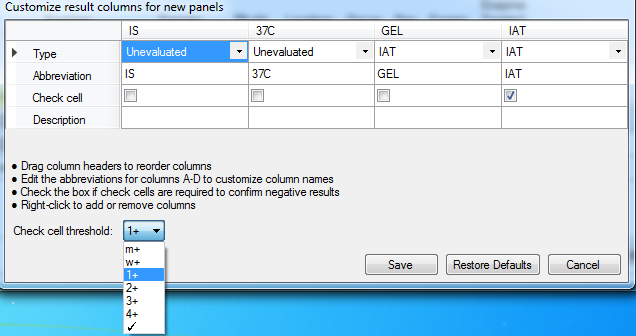
In the Customize Results Columns screen, administrators may customize the results columns that will appear in Results Worksheets for all users. The default results columns are IAT, ENZ, DTT, A, B, C, and D respectively. By default, A, B, C, and D exclude by the same rules as IAT.
From here, columns may be added, renamed, repositioned, removed, or set to exclude by different rules. Right-clicking on a column will give you the option to Add Column or Remove Column. Editing the Abbreviation text will change the name of the column. By dragging a column with the mouse, it can be repositioned. The dropdown menu in the Type row allows you to assign each column to exclude by IAT, Enzymes, DTT, or by Adsorption rules (see page??), or the Unevaluated column can display results that are not evaluated on the worksheet. The description field will display any text you enter to identify the column or testing method on your worksheet.
Finally, selecting or de-selecting the Check Cell box will add or remove a check cell requirement to each result in that column. The check cell threshold may then be set by using the Check Cell Threshold dropdown menu at the bottom of the screen. If you select the check mark at the bottom, your check cell results will either be a check for postitive, or an "x' for negative.
To restore the default arrangement of results columns, simply select Restore Defaults. Please note that when adding, removing, or editing results columns, the Results Worksheet will not reflect your changes until it is cleared and a new one is started.
Please note that Customize Results Columns will set the default columns that will appear anytime a user opens a Results Worksheet unless the user is importing results from a blood analyzer machine. In this case only the blood analyzer result column will appear, and other columns may be added manually.
Rare Cell Inventory
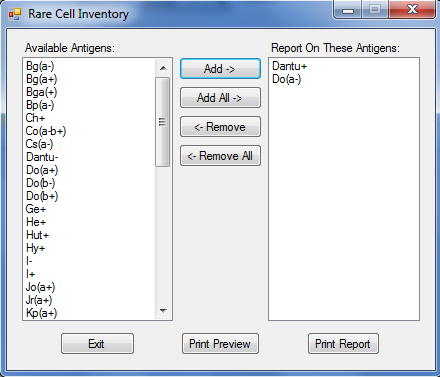
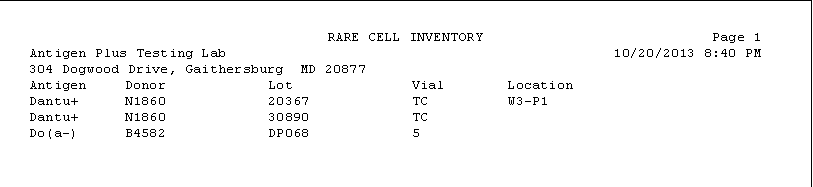
This option calls up a list of all the special typings (additional antigens) in your database. You may search for all or some of them and print out a report.
Since BioTest has added Coltons and Diegos to their standard array and Quotient has added Wra, these additional antigens will not appear on the rare cell inventory list but can be enumerated by searching for them on the Search screen.
Analyzer Connections
This option allows you to view and manage your blood analyzer machine connections. For more information on analyzer connections, see page 38.
Exclusion Criteria
The default exclusion criteria in Antigen Plus are taken from the AABB Technical Manual. In many cases, laboratories may wish to set stricter criteria to determine exclusion by their own standards. Therefore, each lab can establish an acceptable number of rule-outs for the exclusion of specific antigens. Only administrators may set the exclusion criteria.
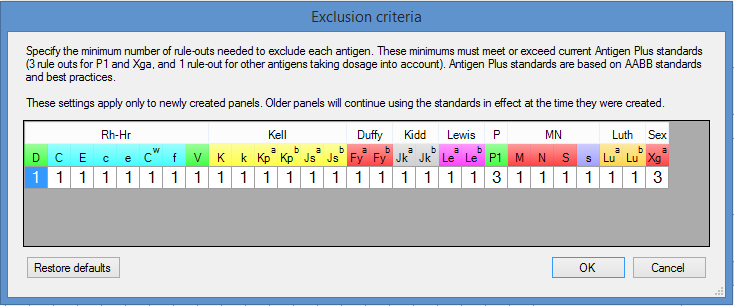
In the Exclusion Criteria menu, you may specify the minimum number of rule-outs needed to exclude each antigen. The criteria are entered by selecting the box and typing the number with the keyboard.
 This picture is one
example of custom exclusion criteria that a user may set.
This picture is one
example of custom exclusion criteria that a user may set.
These minimums must meet or exceed current Antigen Plus standards, which are based on AABB standards and best practices. These settings will apply only to newly created panels. Older panels will continue using the standards in effect at the time they were created. If you load a results worksheet that was saved before changes were made to your exclusion criteria, a warning will appear at the top of the screen.
To restore your exclusion criteria back to the default AABB standards, select Restore Defaults.
View Menu
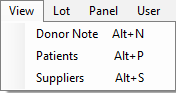
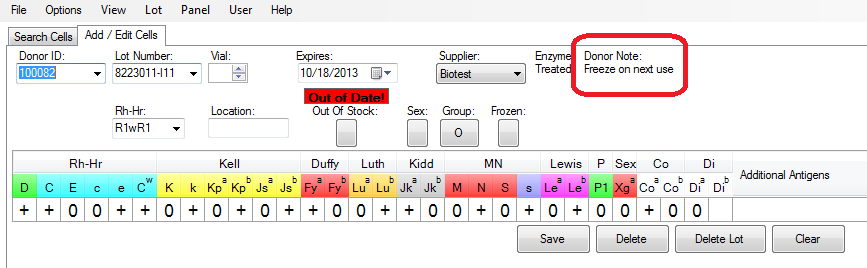
Donor Note
When a donor is selected on the Search screen or Add/Edit screen, the donor note option allows a note to be inserted that will stay with that donor number (regardless of lot number) until it is removed.

The donor note will be displayed with the cell on the Add/Edit or Search screens.
Patients
The appearance and behavior of the Maintain Patients window changed substantially in Antigen Plus 8.5.55. If you are using an earlier version of Antigen Plus, you can view the previous documentation.
The Patients menu opens the Maintain Patients screen where patient information may be viewed and edited. Note that this window is empty until you perform a search.
You can search by patient name, patient ID, date of birth, or some combination of these. Separate search terms with spaces.
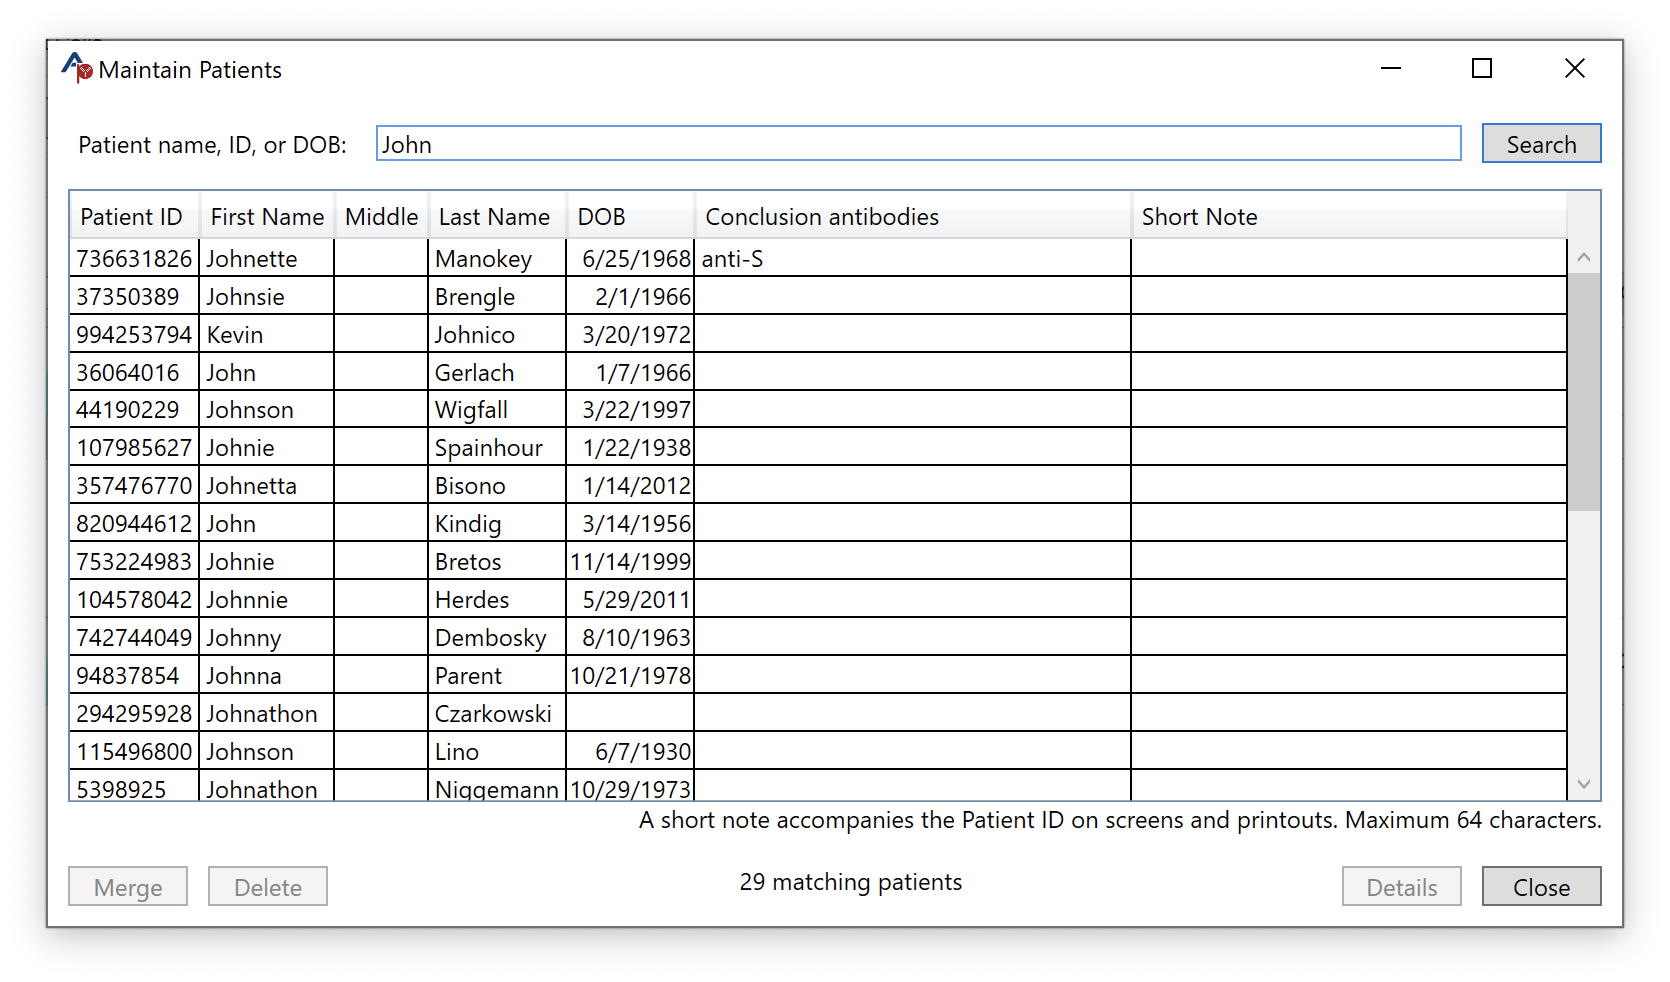
Double clicking on a patient will bring up the Patient Details screen. From there you can select Edit to change patient details and phenotype. When editing patient information, you must enter a reason for the edit. This will be saved along with the user that made the change and the date and time of the edit.
For more on working with patient information in Antigen Plus, see Patient Information.
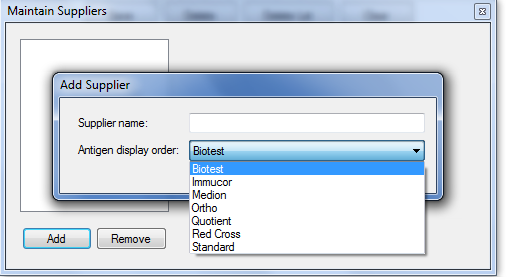
Suppliers
This option allows entry of a supplier other than the currently licensed commercial red cell manufacturers. This is primarily for reference laboratories who are typing their own cells or receiving cells from other sources. Any of the available antigen arrays may be associated with the new supplier.
Lot Menu
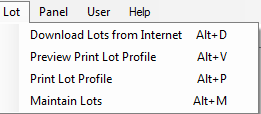
The Lot menu connects you with the Antigen Plus server for download of commercial red cell panels (see Downloading Lots from the Internet), and allows for preview or printing of any lot that is selected on the Add/Edit or Search screens.
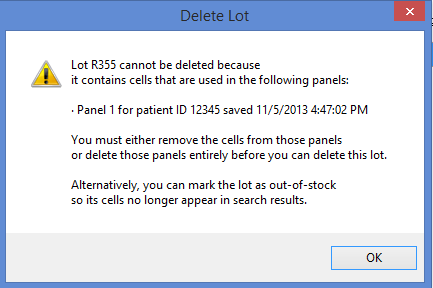
Selecting Maintain Lots opens the Maintain Lots table. On this table you can delete one or more lots (as long as they have not been used in any saved work in the last ten years) by highlighting a row (or highlighting several rows by holding down the CTRL key), clicking on Delete Selected Lots, and then clicking Save Changes. You may also mark any lot as out-of-stock or enzyme treated. A lot that is in-stock but has one or more cells that are out-of-stock will be marked with a square rather than a check mark in the box. Lots can be sorted in forwards or backwards Lot Number or Expiration Date order by clicking at the top of the column.

If you attempt to delete a lot that has been used in a saved workup, you will be notified that the saved work must be deleted before the lot can be deleted. Deletion of saved work-ups may only be done after ten years have passed since the panel was saved. If it is too early or you do not wish to delete the work and the lot, you may mark the lot as out-of-stock thus removing it from searchable inventory while saving any work that has been done with it.
Panel Menu
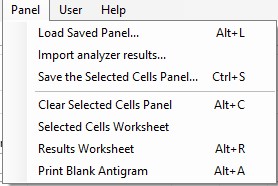
The Panel Menu brings up a variety of options that are the most frequently used in Antigen Plus.
If those options are unavailable (i.e. there are no cells selected), they will be greyed out on the screen.
Load Saved Panel
The appearance and behavior of the Load Saved Panel window changed substantially in Antigen Plus 8.5.55. If you are using an earlier version of Antigen Plus, you can view the previous documentation.
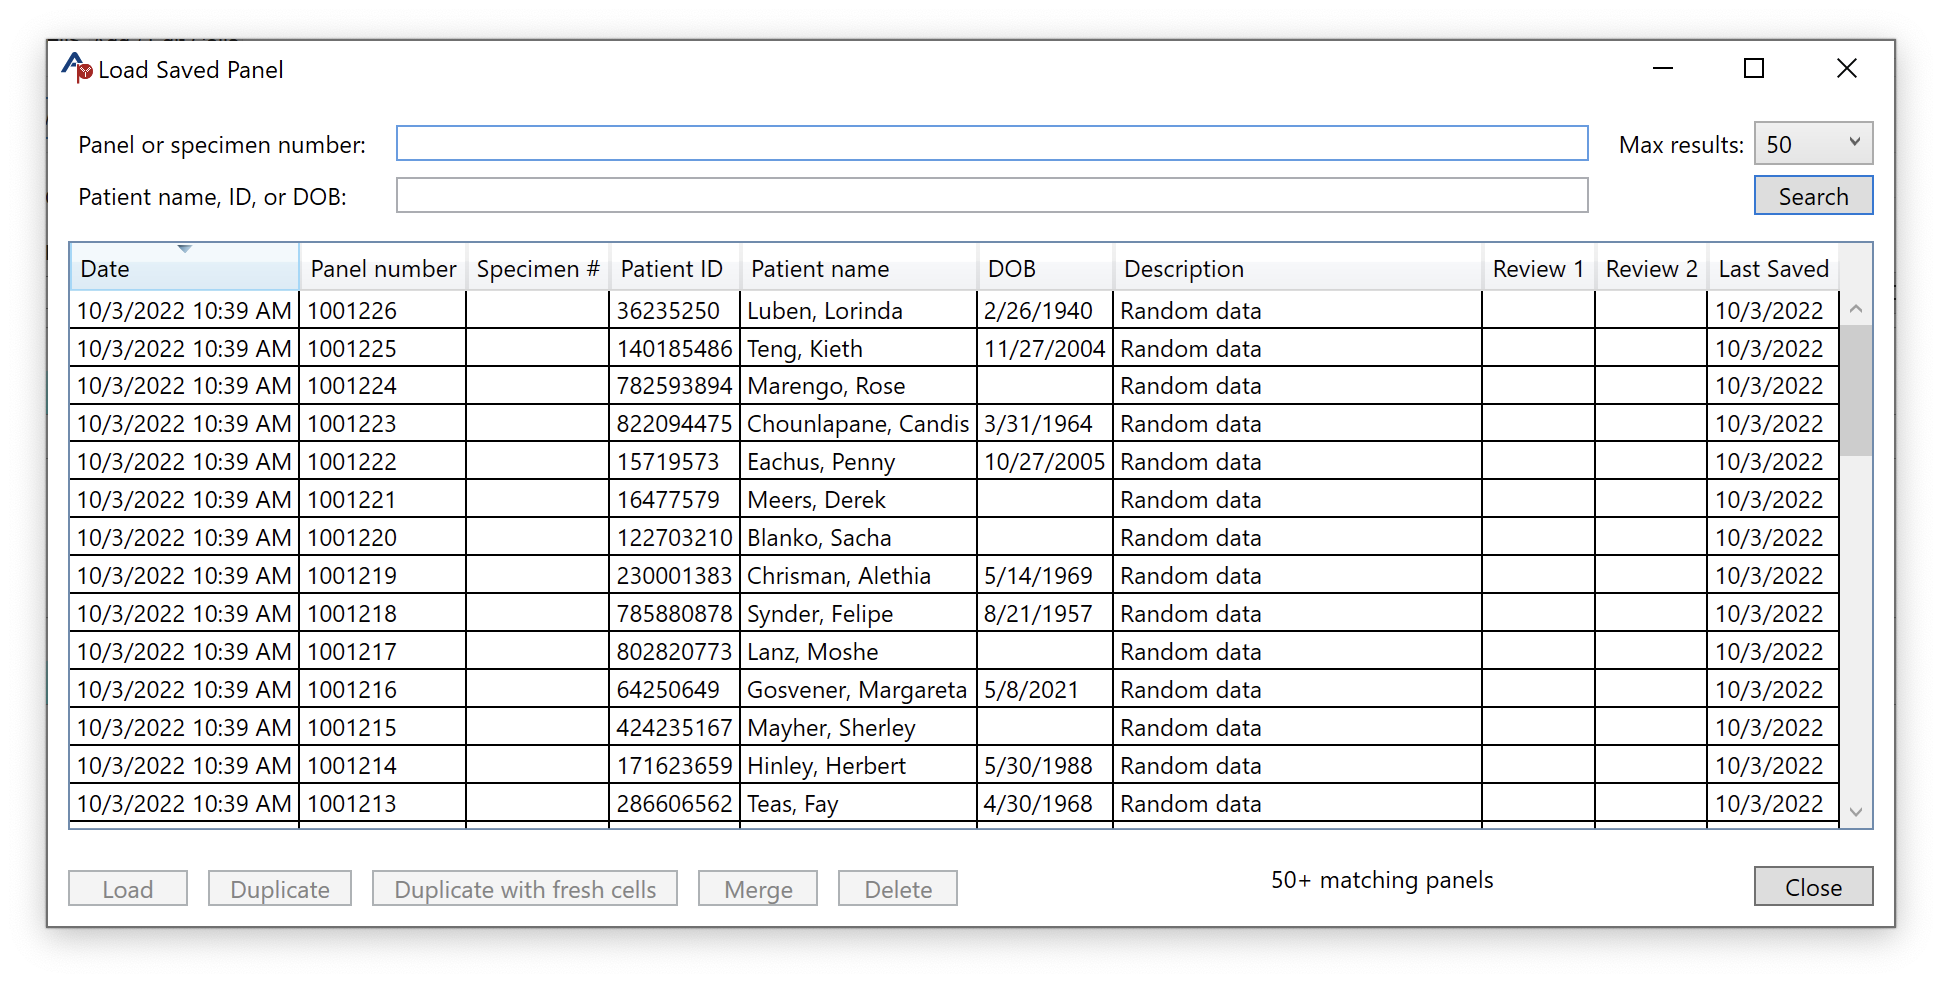
This option opens up a table of all saved work-ups (any selected panel that has been saved with or without test results). By default, the 50 most recent panels are displayed.
Searching
You may search for a particular panel by panel number or specimen number. Type Enter or click the Search button to begin the search. You can also scan a barcode to perform a search.
You can also search by patient name, patient ID, date of birth, or some combination of these. Separate search terms with spaces. (Note that because patient information is encrypted, searching by patient can be slower than searching by panel.)
You can control the maximum number of search results displayed by changing the Max results field. You must search again after changing this field.
Selecting and loading panels
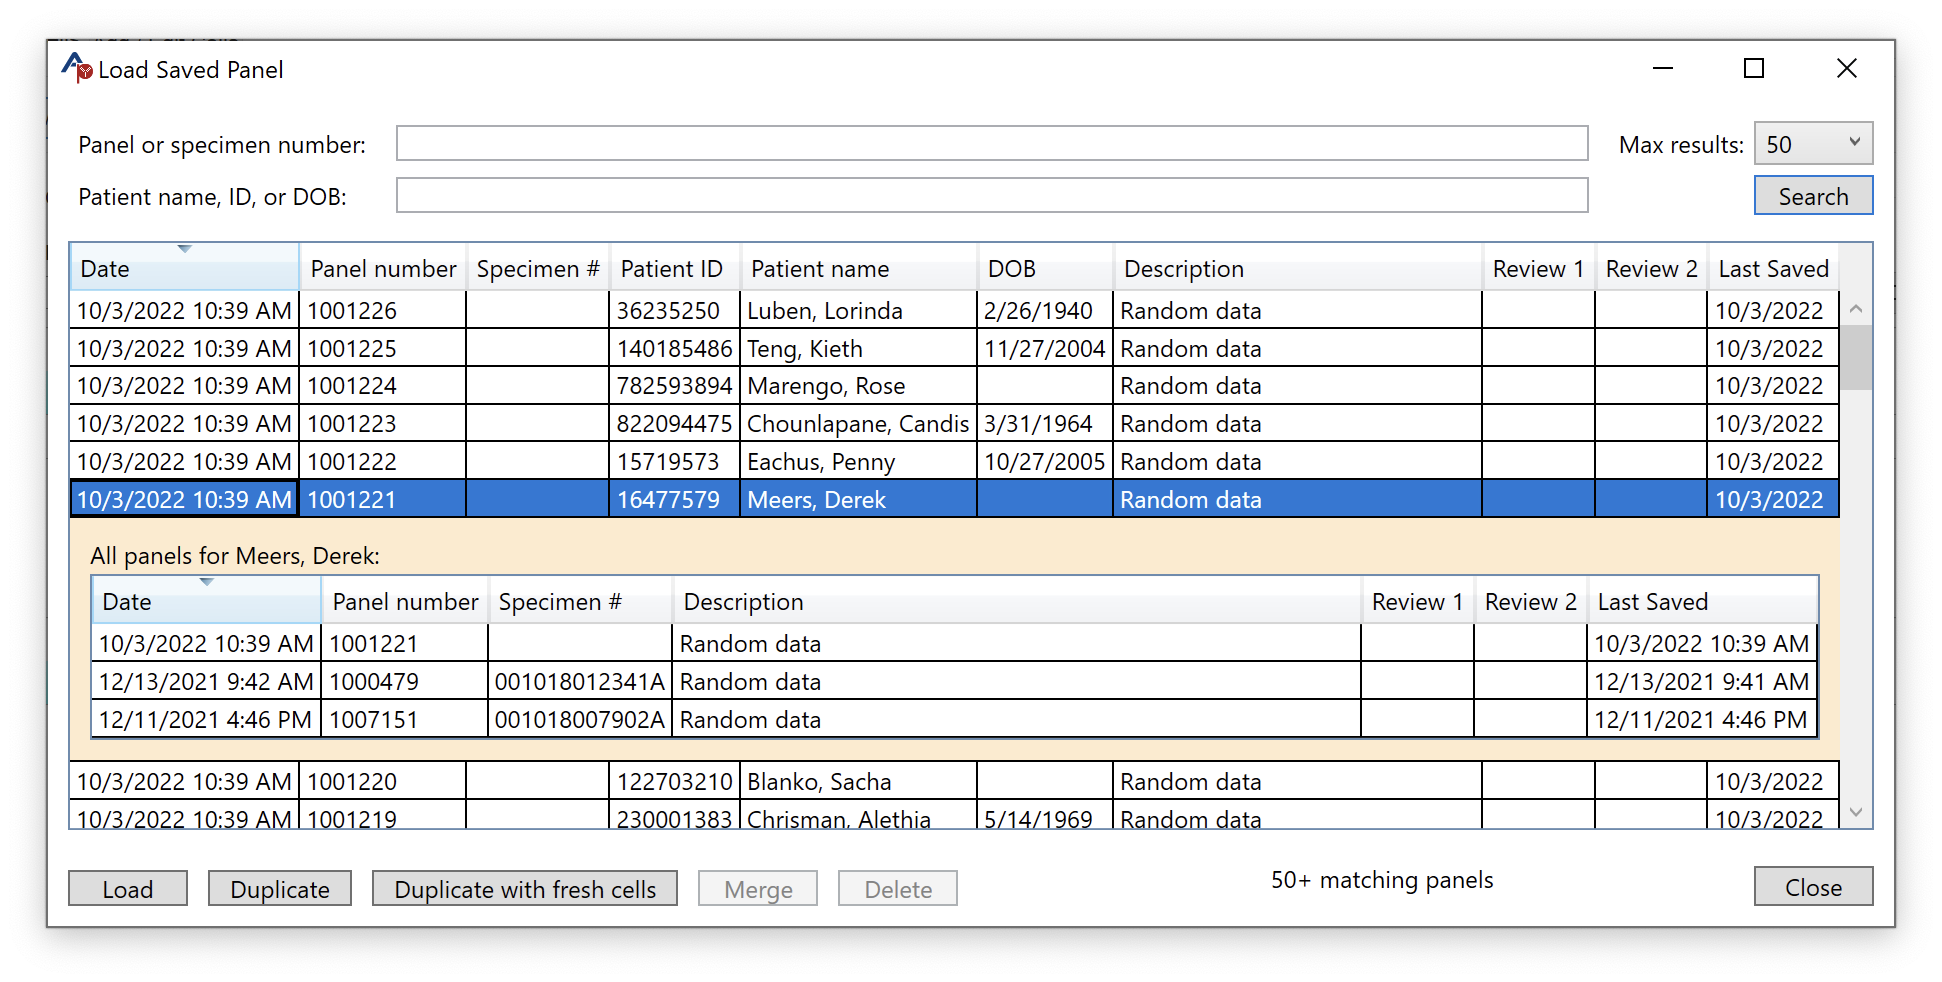
A saved panel may be retrieved for further work or review by selecting its row and pressing Load or by double-clicking on the row. Once the saved panel is retrieved, all of the information it was saved with will populate the appropriate screens ( Search , Selected Cells Worksheet , and Results Worksheet ).
When you select a panel, a secondary table will appear showing all of the panels associated with that patient. This simplifies merging multiple worksheets for the same patient.
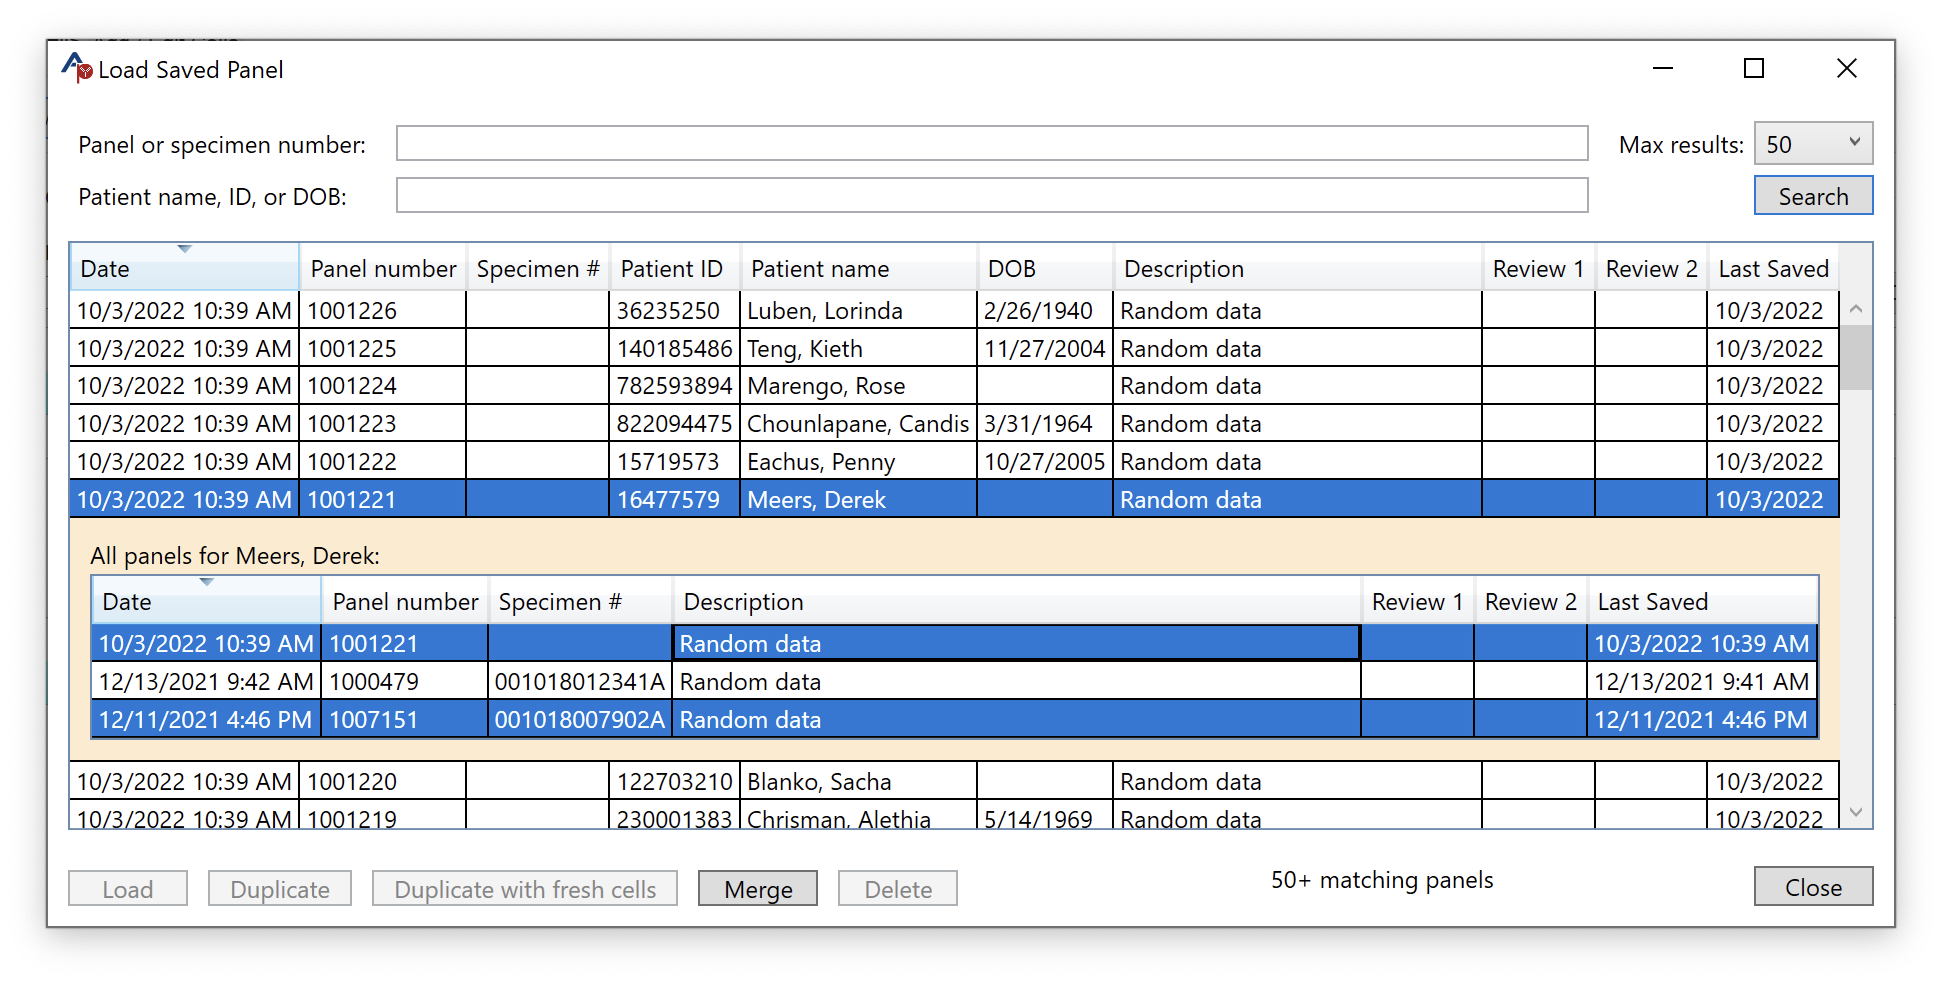
As with many Windows programs, you can hold down the Shift key when you click to select a continuous range of panels, and you can Control-click to select a discontinuous range of panels.
A saved panel may also be deleted from this table if it is ten years old — a confirmatory warning will appear after Delete is selected.
Duplicate creates an exact copy of whichever saved panel is currently selected. That panel may then be saved as a new panel.
Duplicate with Fresh Cells also makes a copy of the saved panel but will also automatically swap out any out-of-date or out-of-stock cells with fresh cells in your inventory that have antigen profiles that are as close as possible to the original.
Merging panels
Two or more panels can be merged in a work-up for a single patient. The primary use of this feature is to be able to merge a screen and a full panel that are run separately in the analyzer, but any set of results for a patient can be merged into one worksheet—all details of the patient must match including specimen number if it was used. All columns that were used in the original panels will appear.
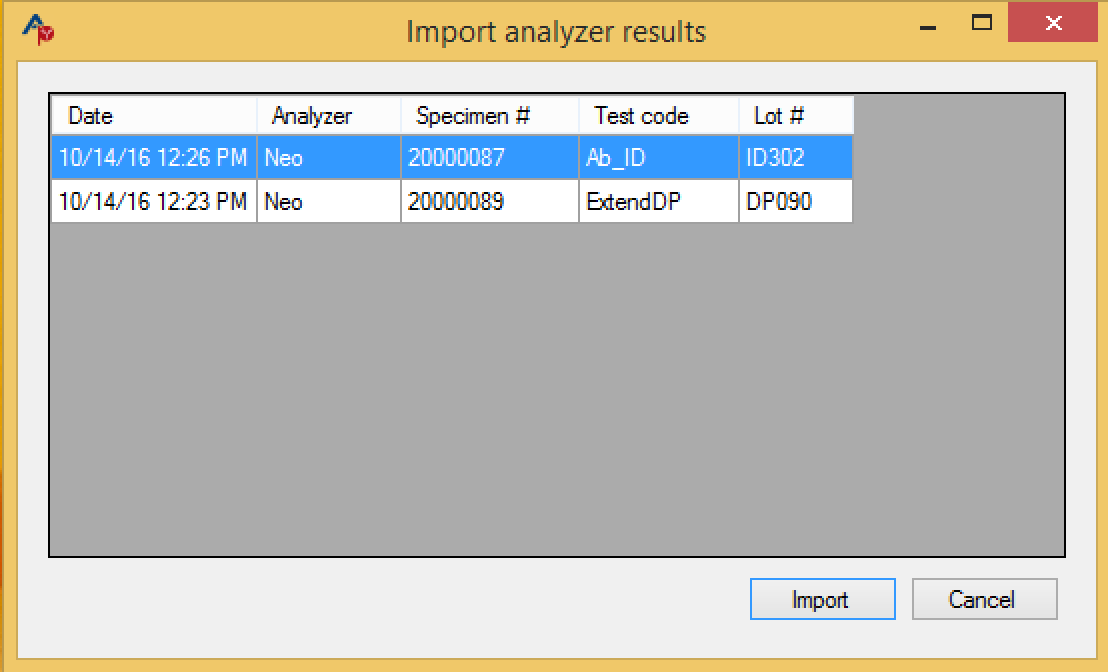
Import Analyzer Results
This menu allows the importing of results from a blood analyzer machine. For more information about importing blood analyzer results, see page 39.
Save the Selected Cells Panel
You may save a Selected Panel (with any results included) from this screen. As this can be done more directly from the Selected Cells Worksheet or Results Worksheet, the function is here so that you may remember to save current work when you are loading another panel (there will also be a warning when you are loading a new panel that one is already in use).
Clear Selected Cells Panel
Selecting Clear Selected Cells Panel will clear all of the currently selected cells. You will be prompted to either save or discard your current work.
Selected Cells Worksheet and Results Worksheet
Selecting Selected Cells Worksheet or Results Worksheet will call up the current work and open those screens. For more information about Selected Cells and Results Worksheets, see Operation on page 19.
Print Blank Antigram
Prints a blank worksheet.
User Menu
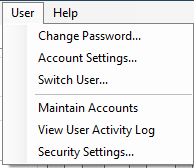
Change Password
Any user can change his or her password. That change can be overridden by an administrator changing that user's password.
Account Settings
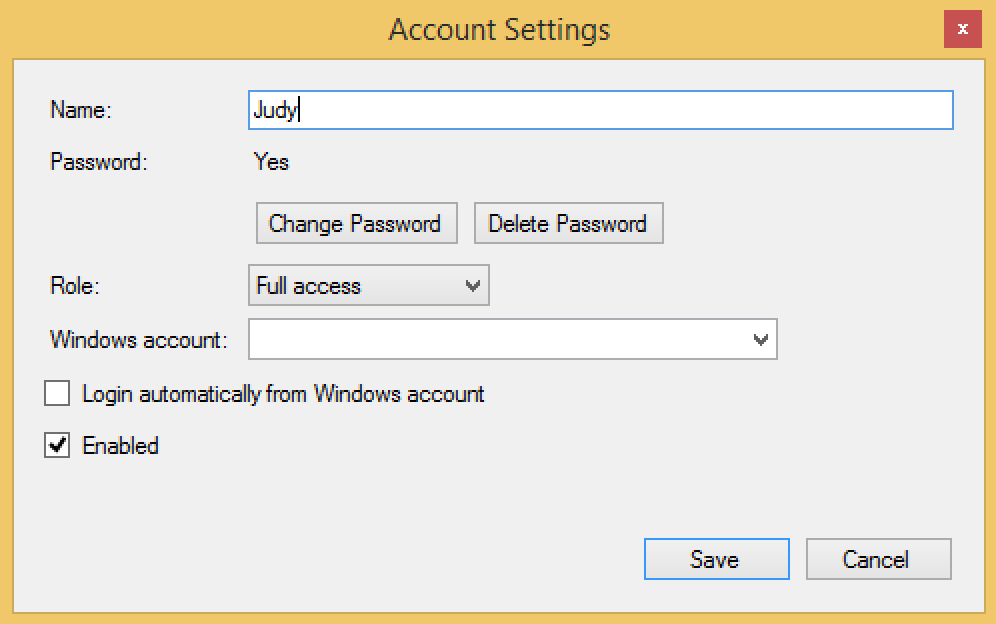
This window allows a user to change their name and password. Administrators may also assign administration rights from this window and enable or disable accounts. A new user may not log in until an administrator has added him or her in the Maintain Accounts table or Windows Active directory is used to authenticate new users (see Authenticating Users on page?? )
Switch User

Logs the current user out and asks for a username and password to continue. A new database may also be selected from this screen.
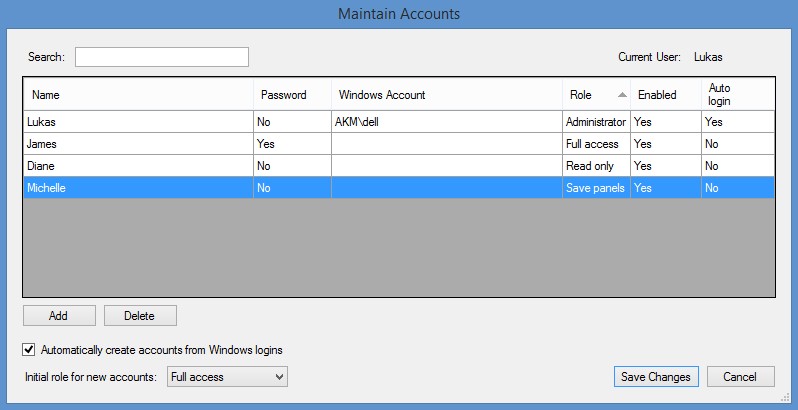
Maintain Accounts
This menu is available only to administrators and is used for managing user access to Antigen Plus. If Automatically create accounts from Windows Login is checked, Antigen Plus will recognize the user from that user's log in to Windows and require a password if the Windows login also requires it. Selecting Add will call up a fresh Account Settings screen and allow the administrator to create a new account. Selecting Delete will delete an account if that user has not saved any work. To remove a user who has saved work in the database, he or she must be disabled. In order to deactivate and account but keep that user displayed on saved work-ups, simply uncheck the Enabled box in the Account Settings window.
Double-clicking on any user will call up the Account Settings screen for that user. Here, an administrator may set access privileges and password preferences. If the user is not set to automatically log-in with their windows account, they must be given a password in order to log-in.
The possible roles an Administrator can grant another user are:
- Administrator
-
Can maintain users, can save panels, can review panels tested by self or another technologist, can remove reviews, can add suppliers, can edit cells, and can edit all patient information. Administrators may also set system options including custom exclusion criteria, whether or not to require specimen numbers, and customize the default results columns.
- Full access
-
Can save panels, can review panels tested by another technologist, can add suppliers, and can edit cells. Full access users cannot edit patient information, but they may add phenotypes to patients.
- Save panels
-
Can search, select, enter results and save panels.
- Read only
-
Can search, select, and enter results but cannot save any work.
Each user may change his or her own password.
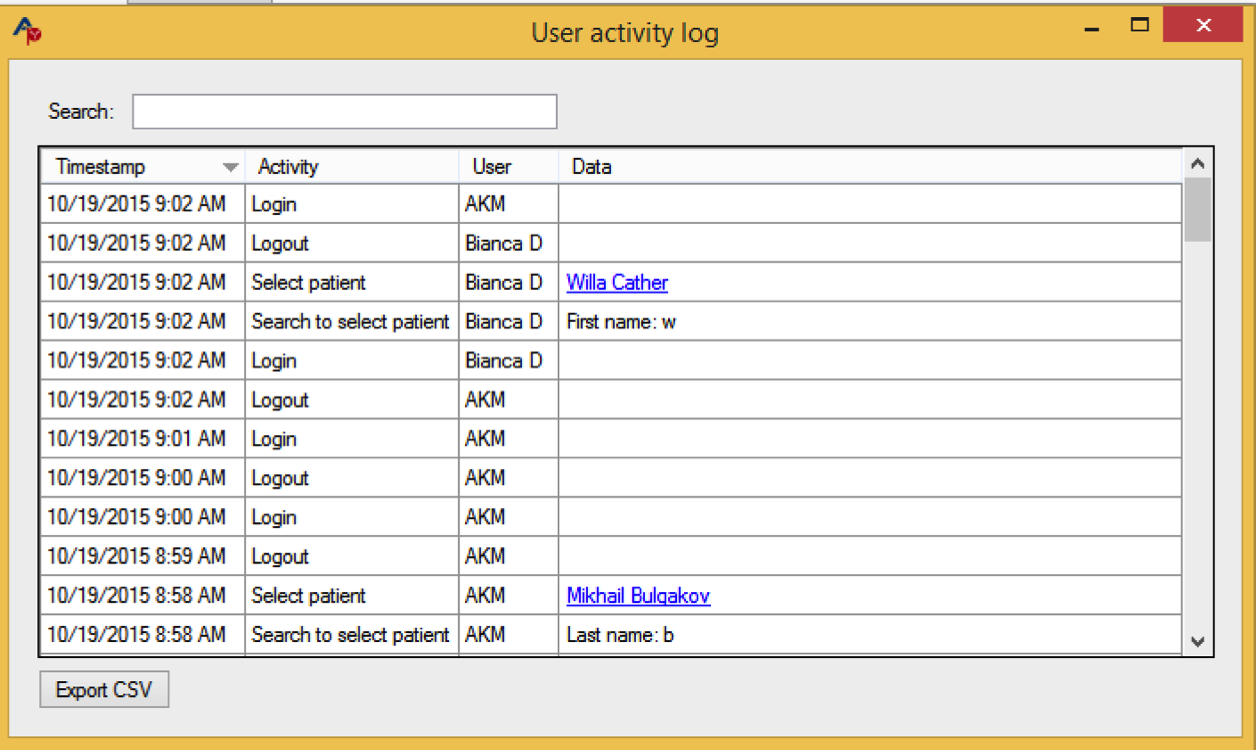
View User Activity Log
An administrator will have this feature enabled and selecting it will call up a log of all user log-ins and all activity involving patient information. This log is exportable in a csv format.
Security Settings for Time Outs and Username/Password Mode
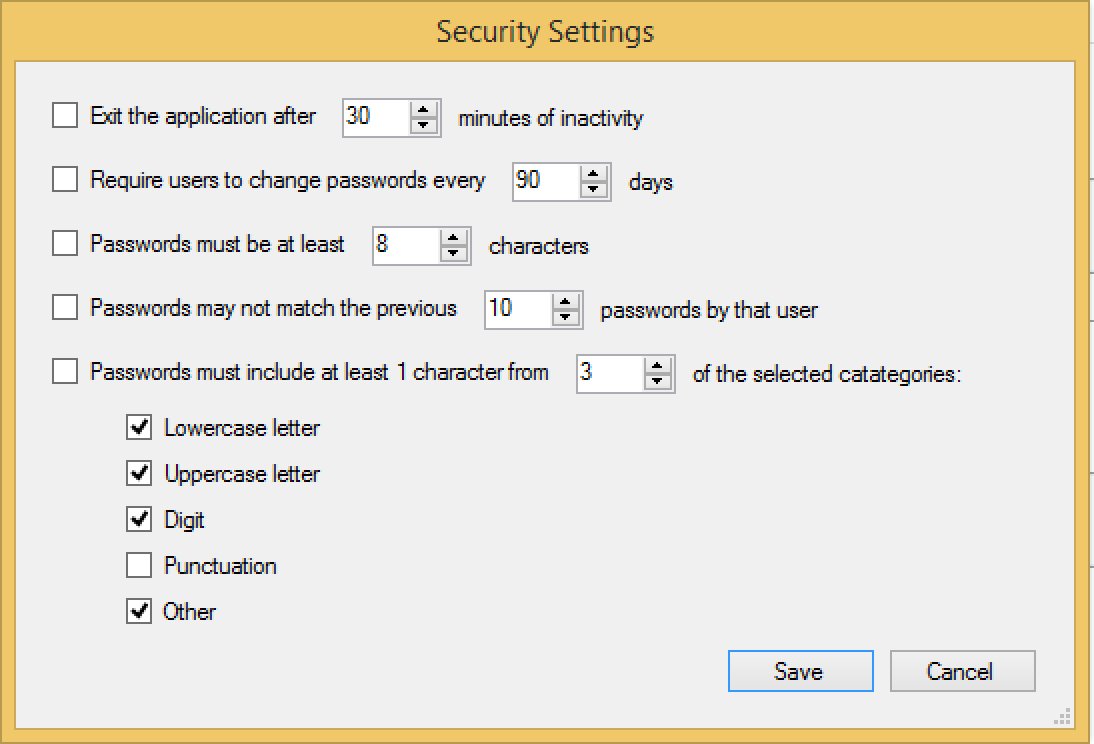
Timing out : If you would like to have the program shut down if left unattended, check the box next to "Exit the Application…" and set your time parameter. If a user leaves the program unattended for that length of time, the program will shut down and the work in progress will reappear only when that user logs back in. This option is available for both automated and manual password access.
The other options are for manual password configurations and are activated by checking the boxes on the left of the options and setting the desired parameters to the right.
Help Menu
The Help Menu makes text regarding the use of Antigen Plus available to the user. That text is reproduced in this manual in the appropriately named sections.